
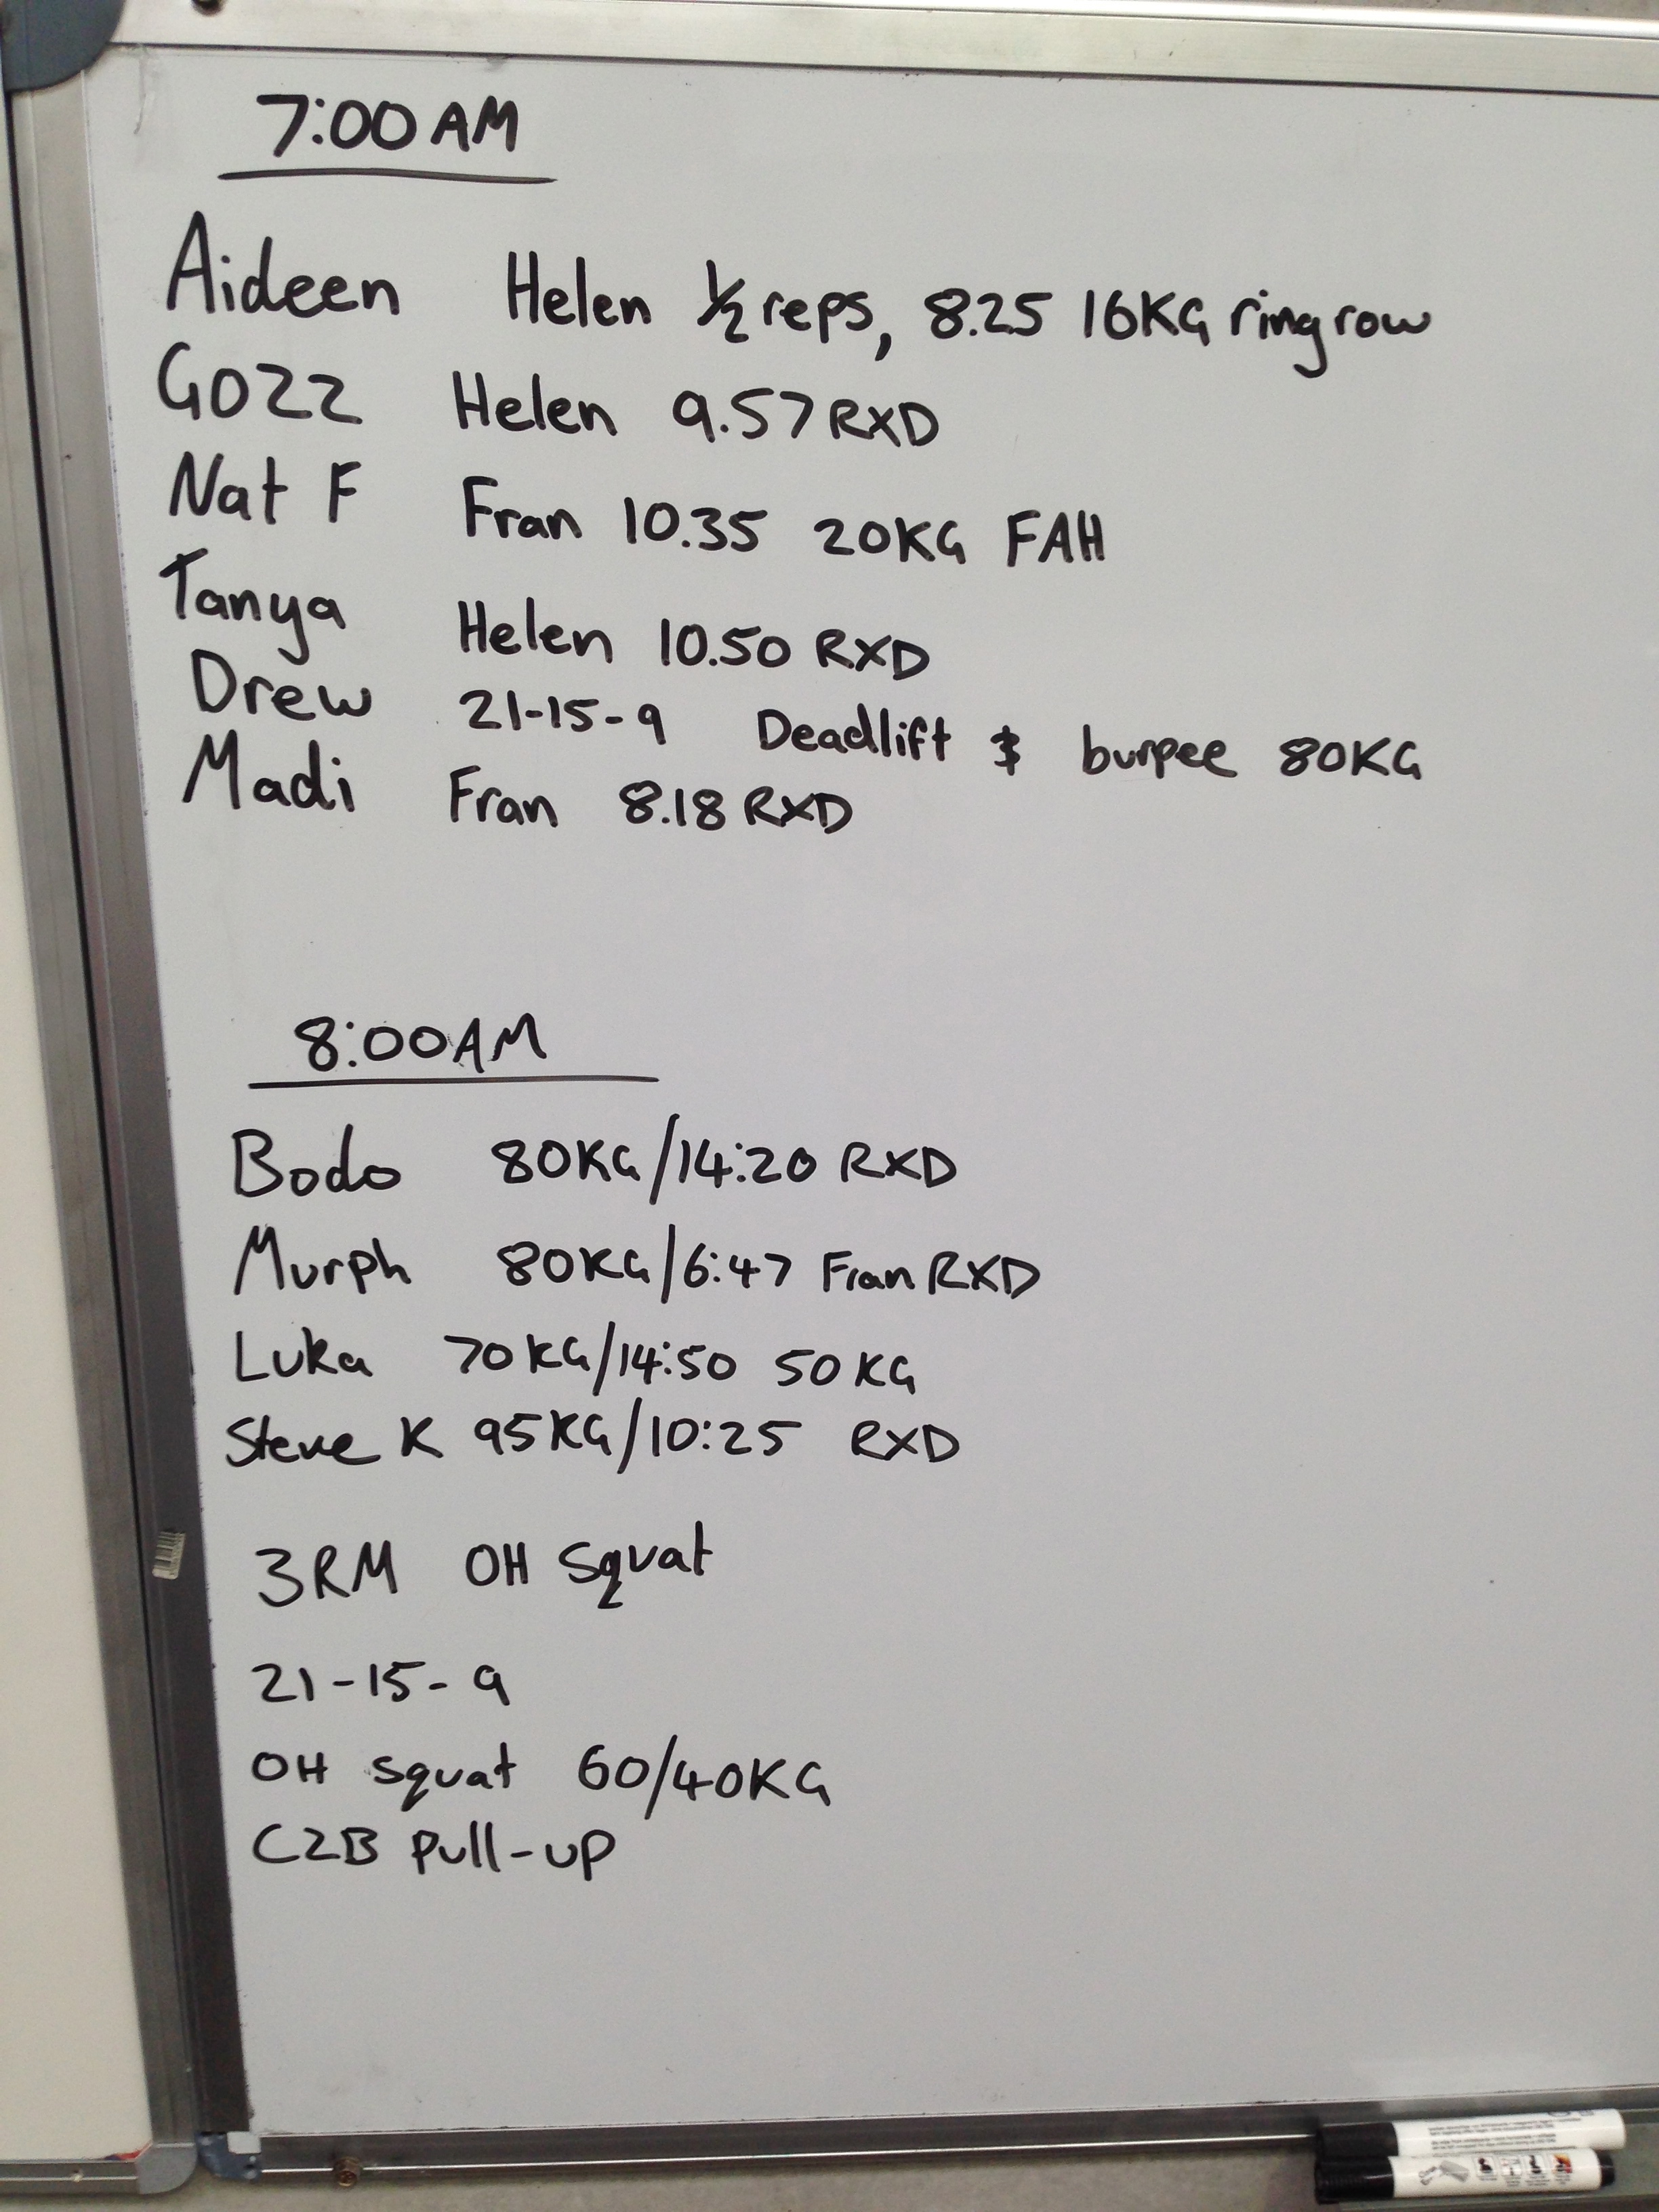
WODs

WOD: Saturday
For anyone keen for a workout I will be heading to beach entrance 229 (see map) at 7:00am for a short session.
All are welcome.
Good Friday
Update: Chris & Marie are training at 3.30pm today – the workout will be a team rowing based workout. The specifics will depend on how many people turn up – all are welcome.
Please note that the gym is closed today for Good Friday. Have a great day!
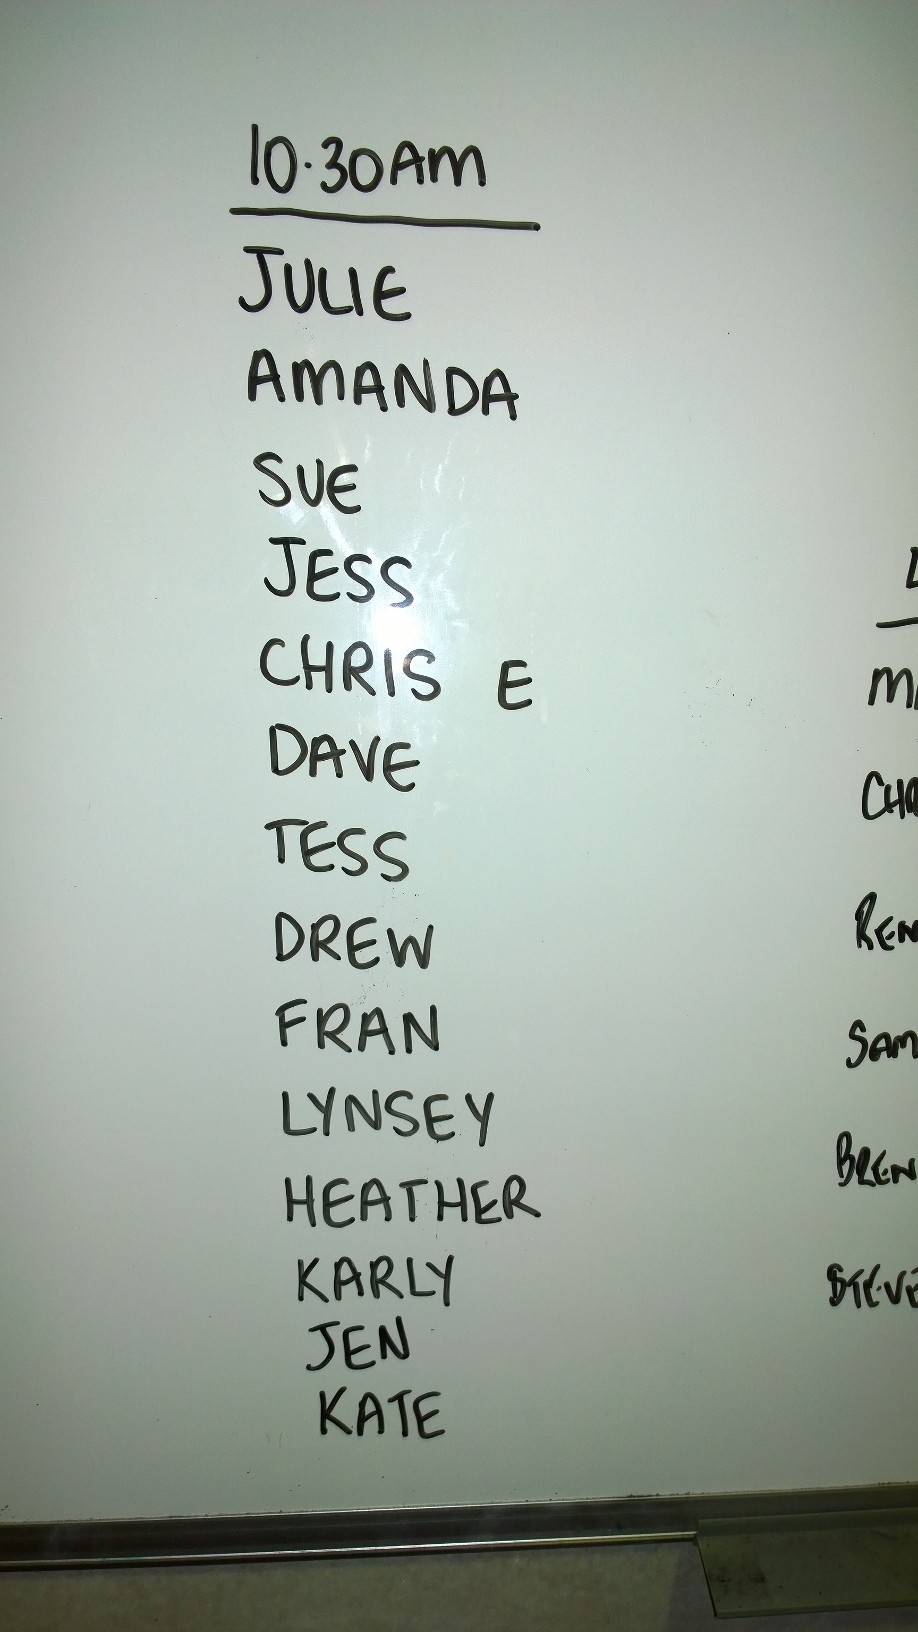
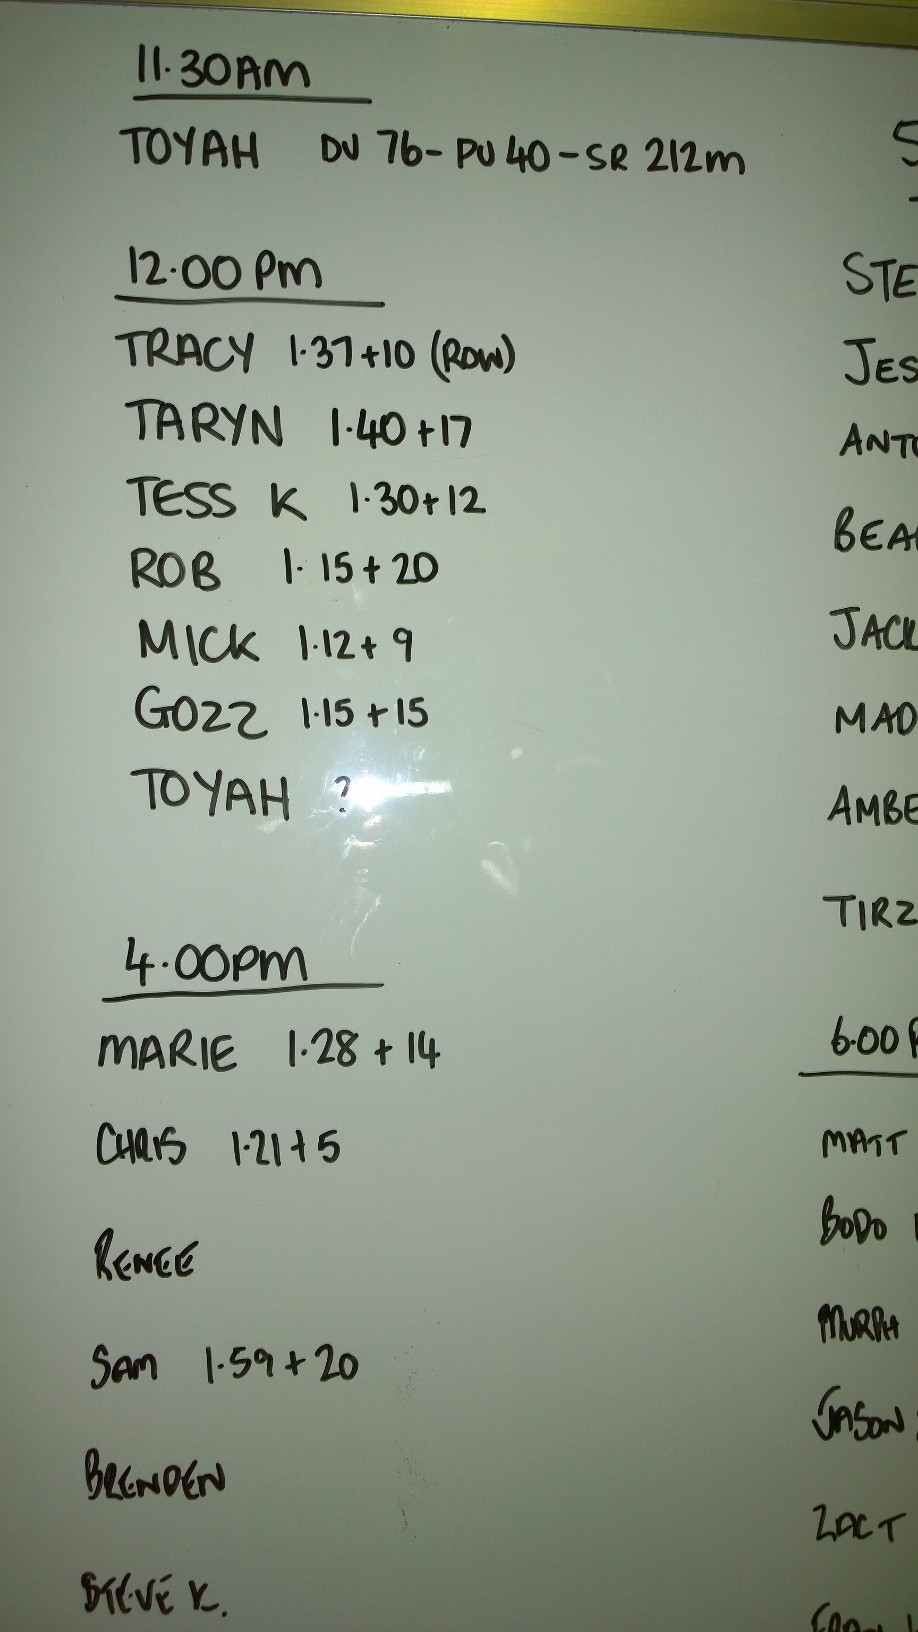
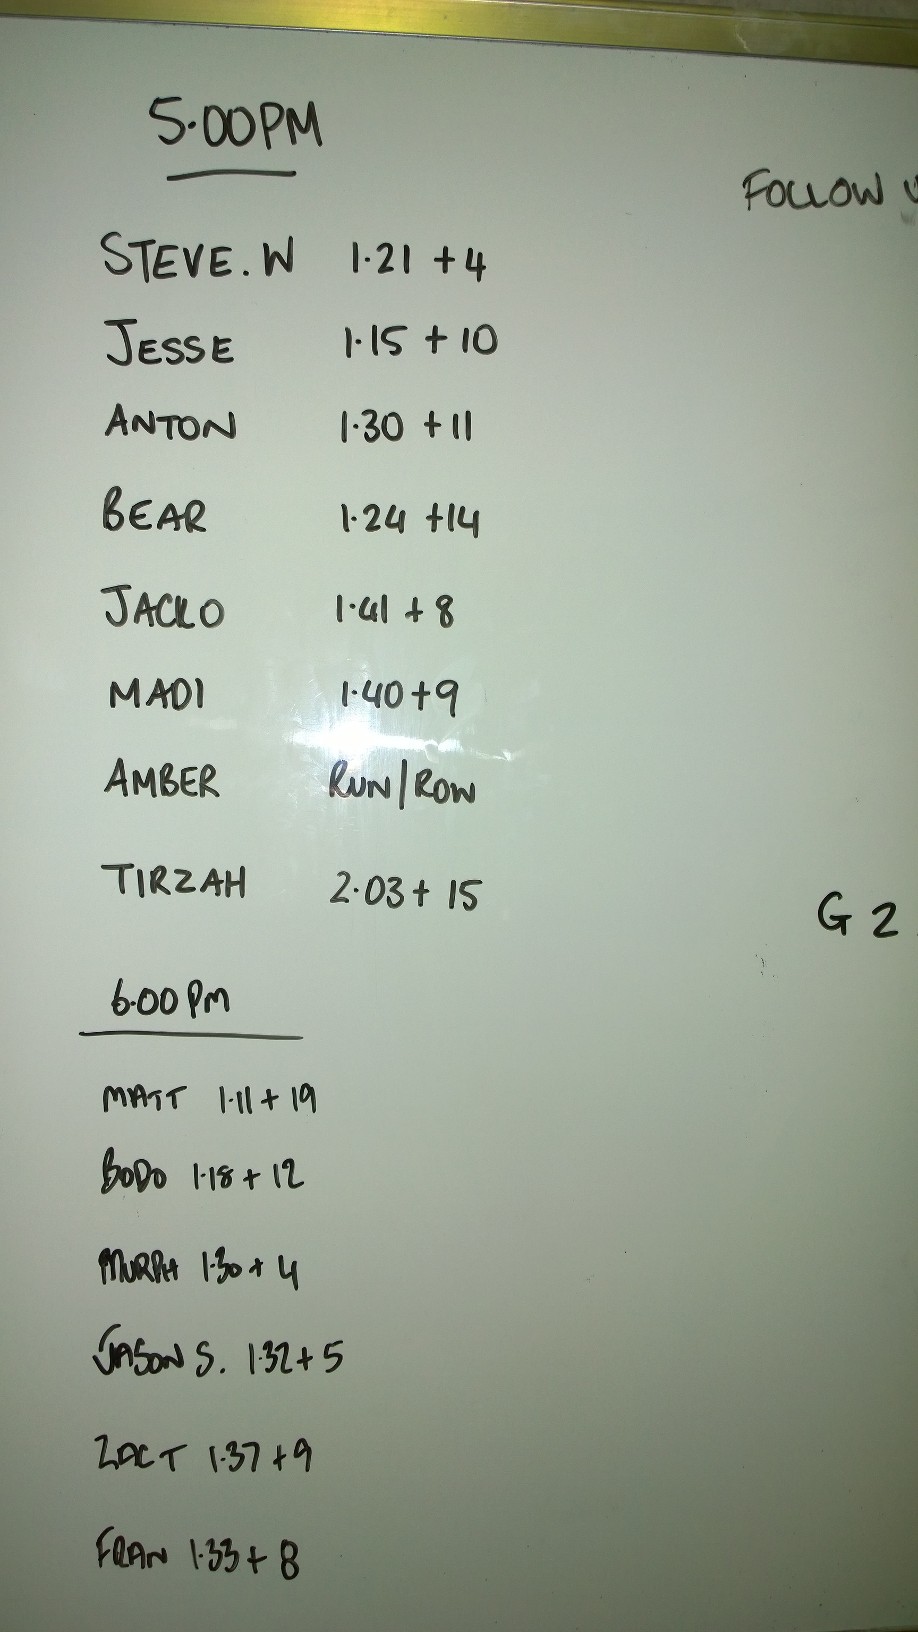
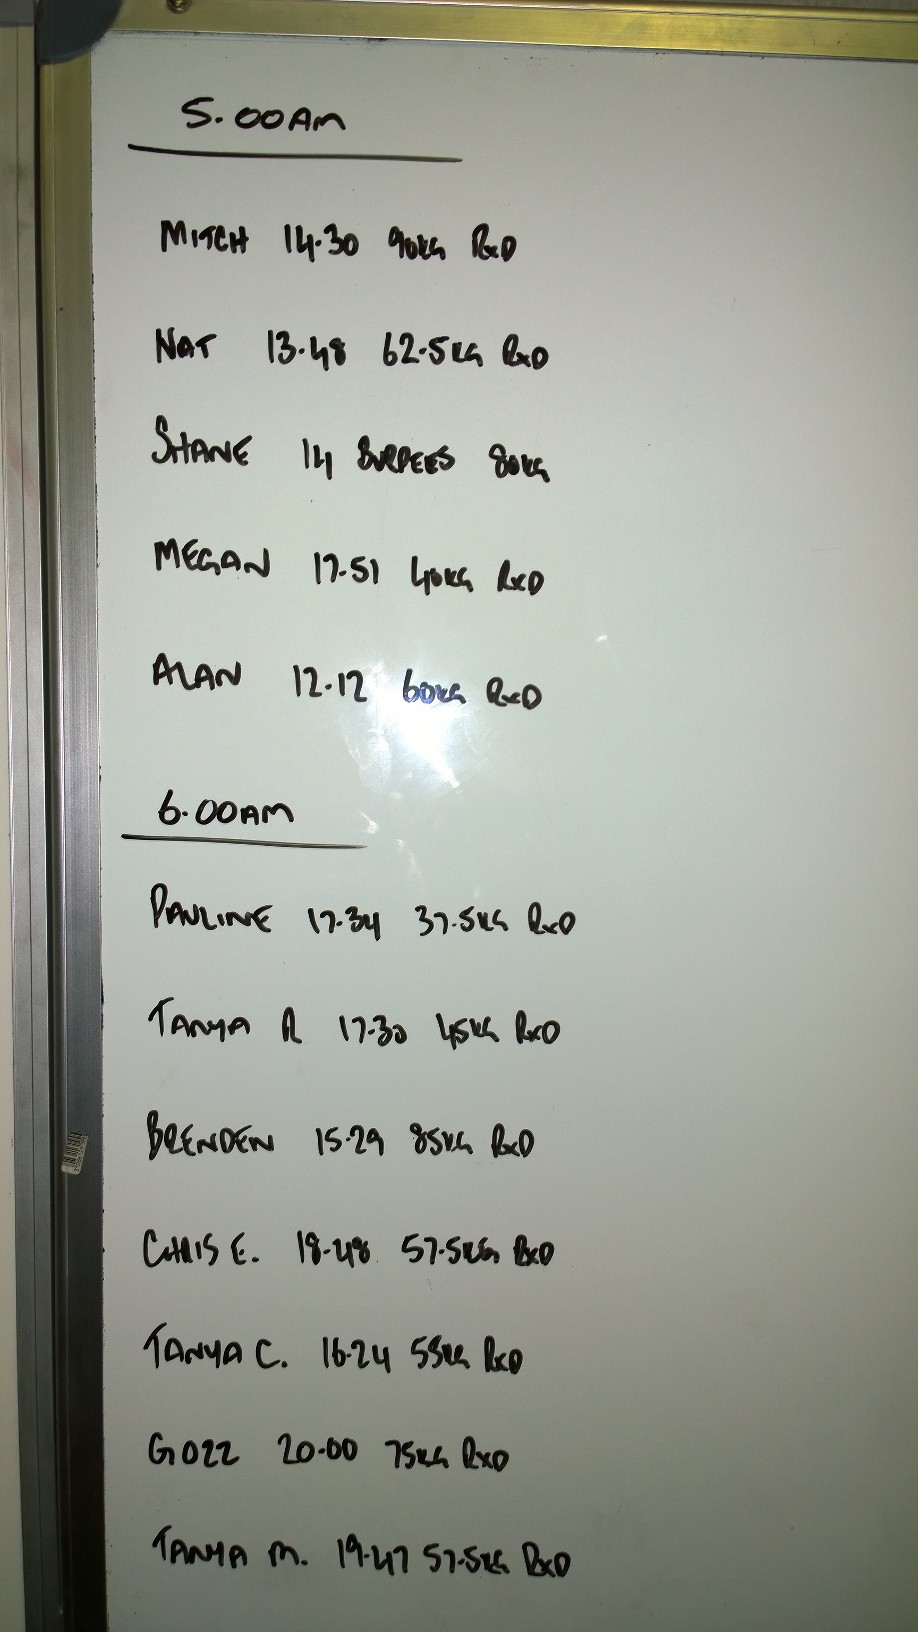
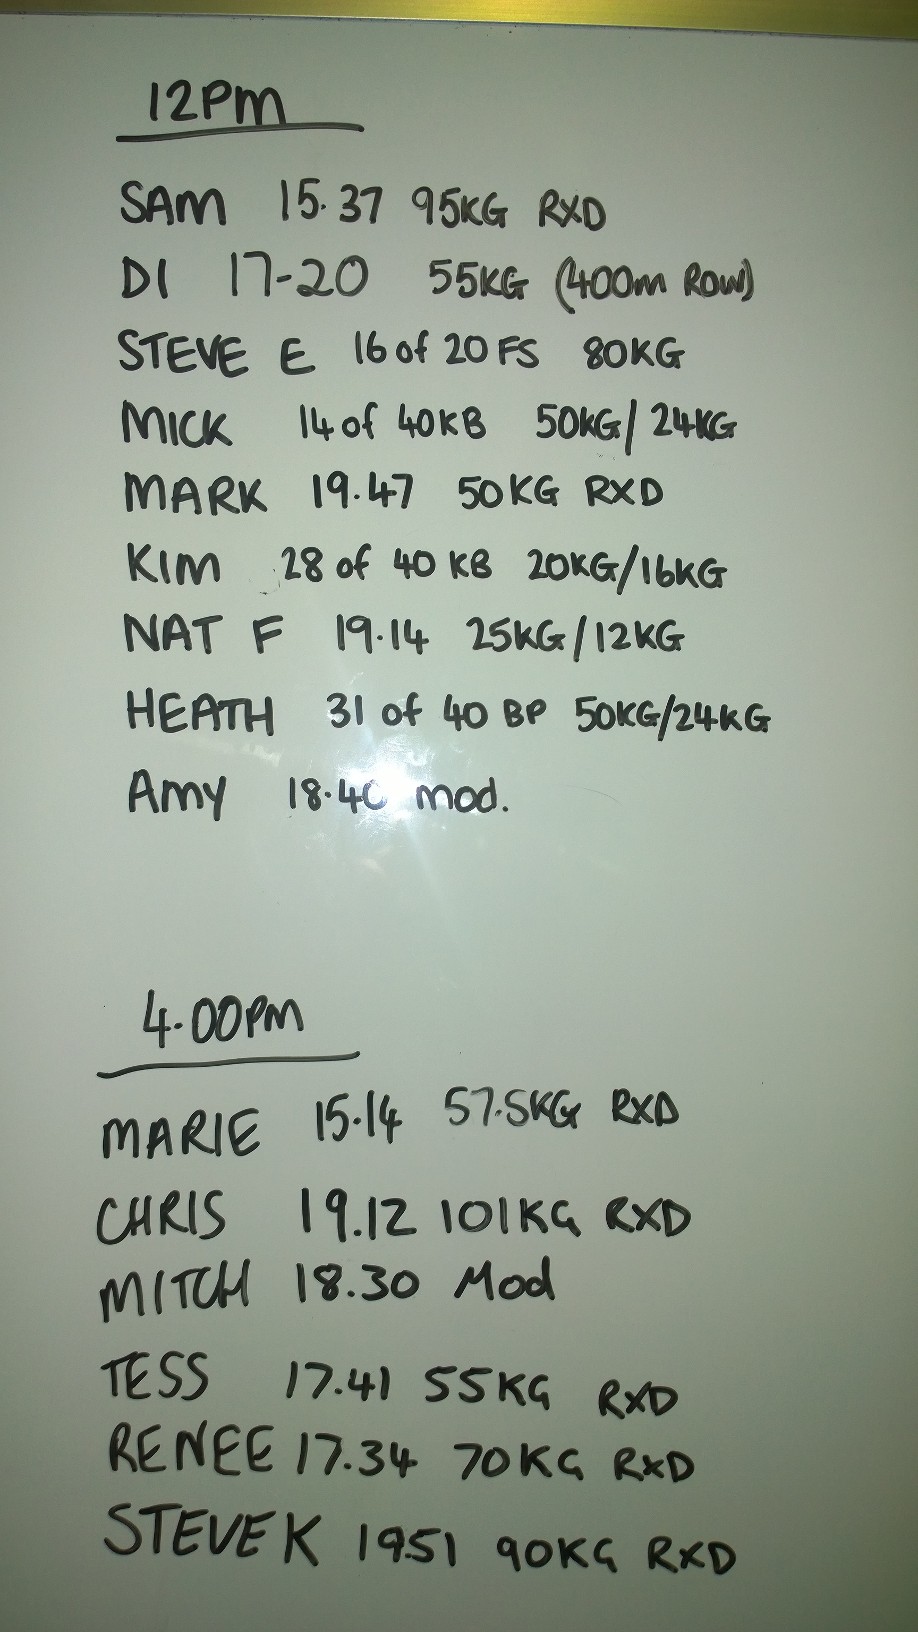
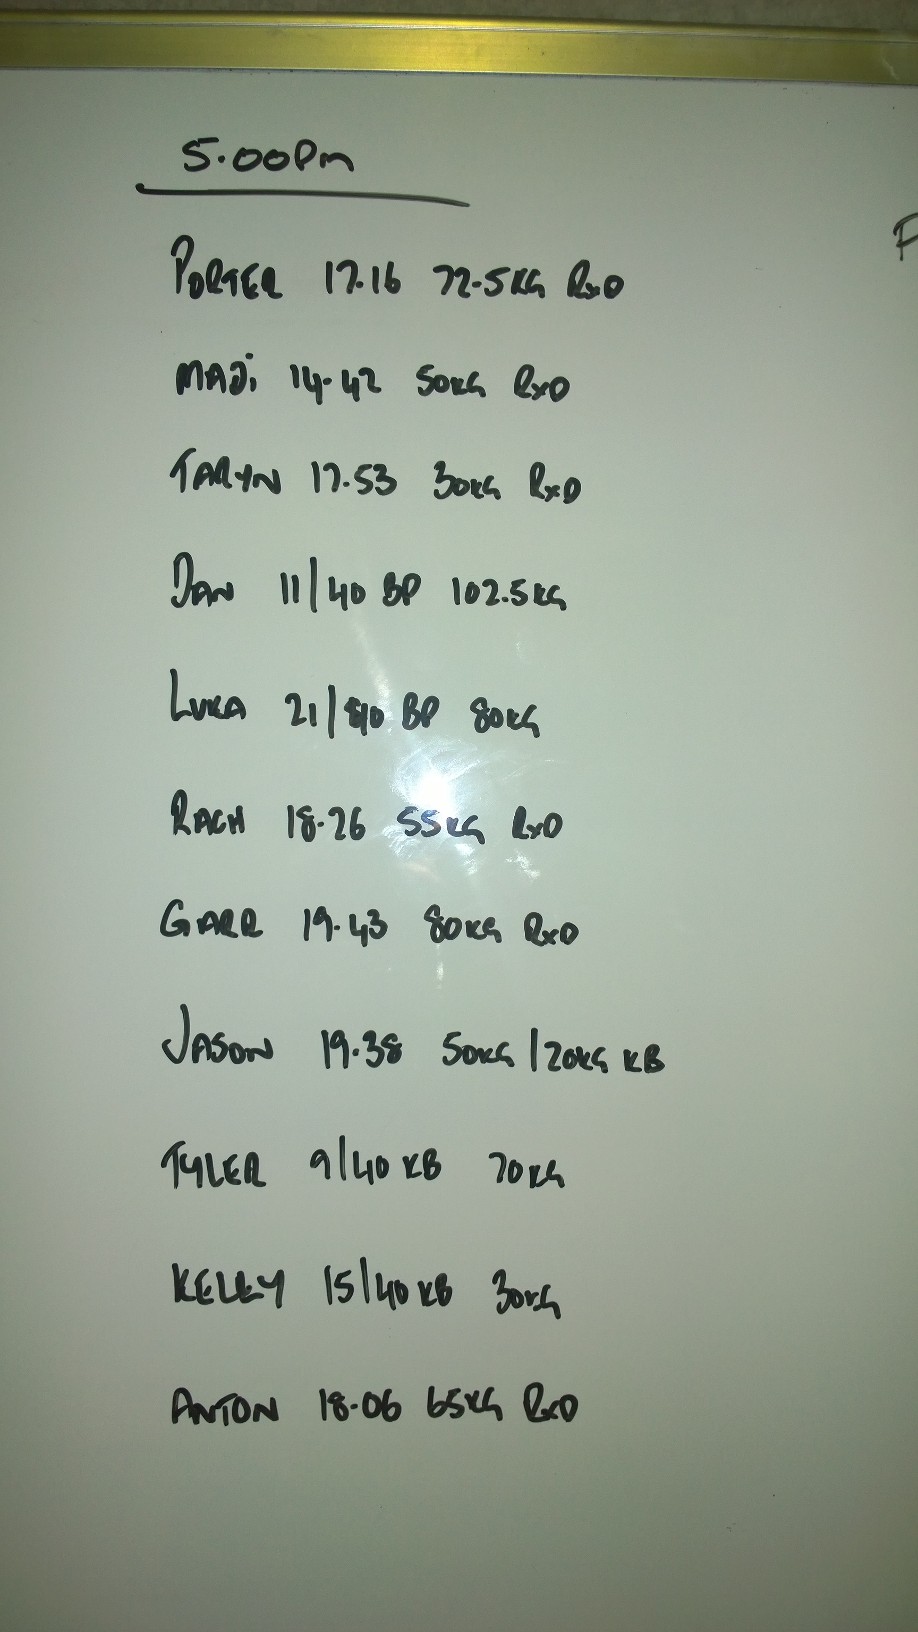
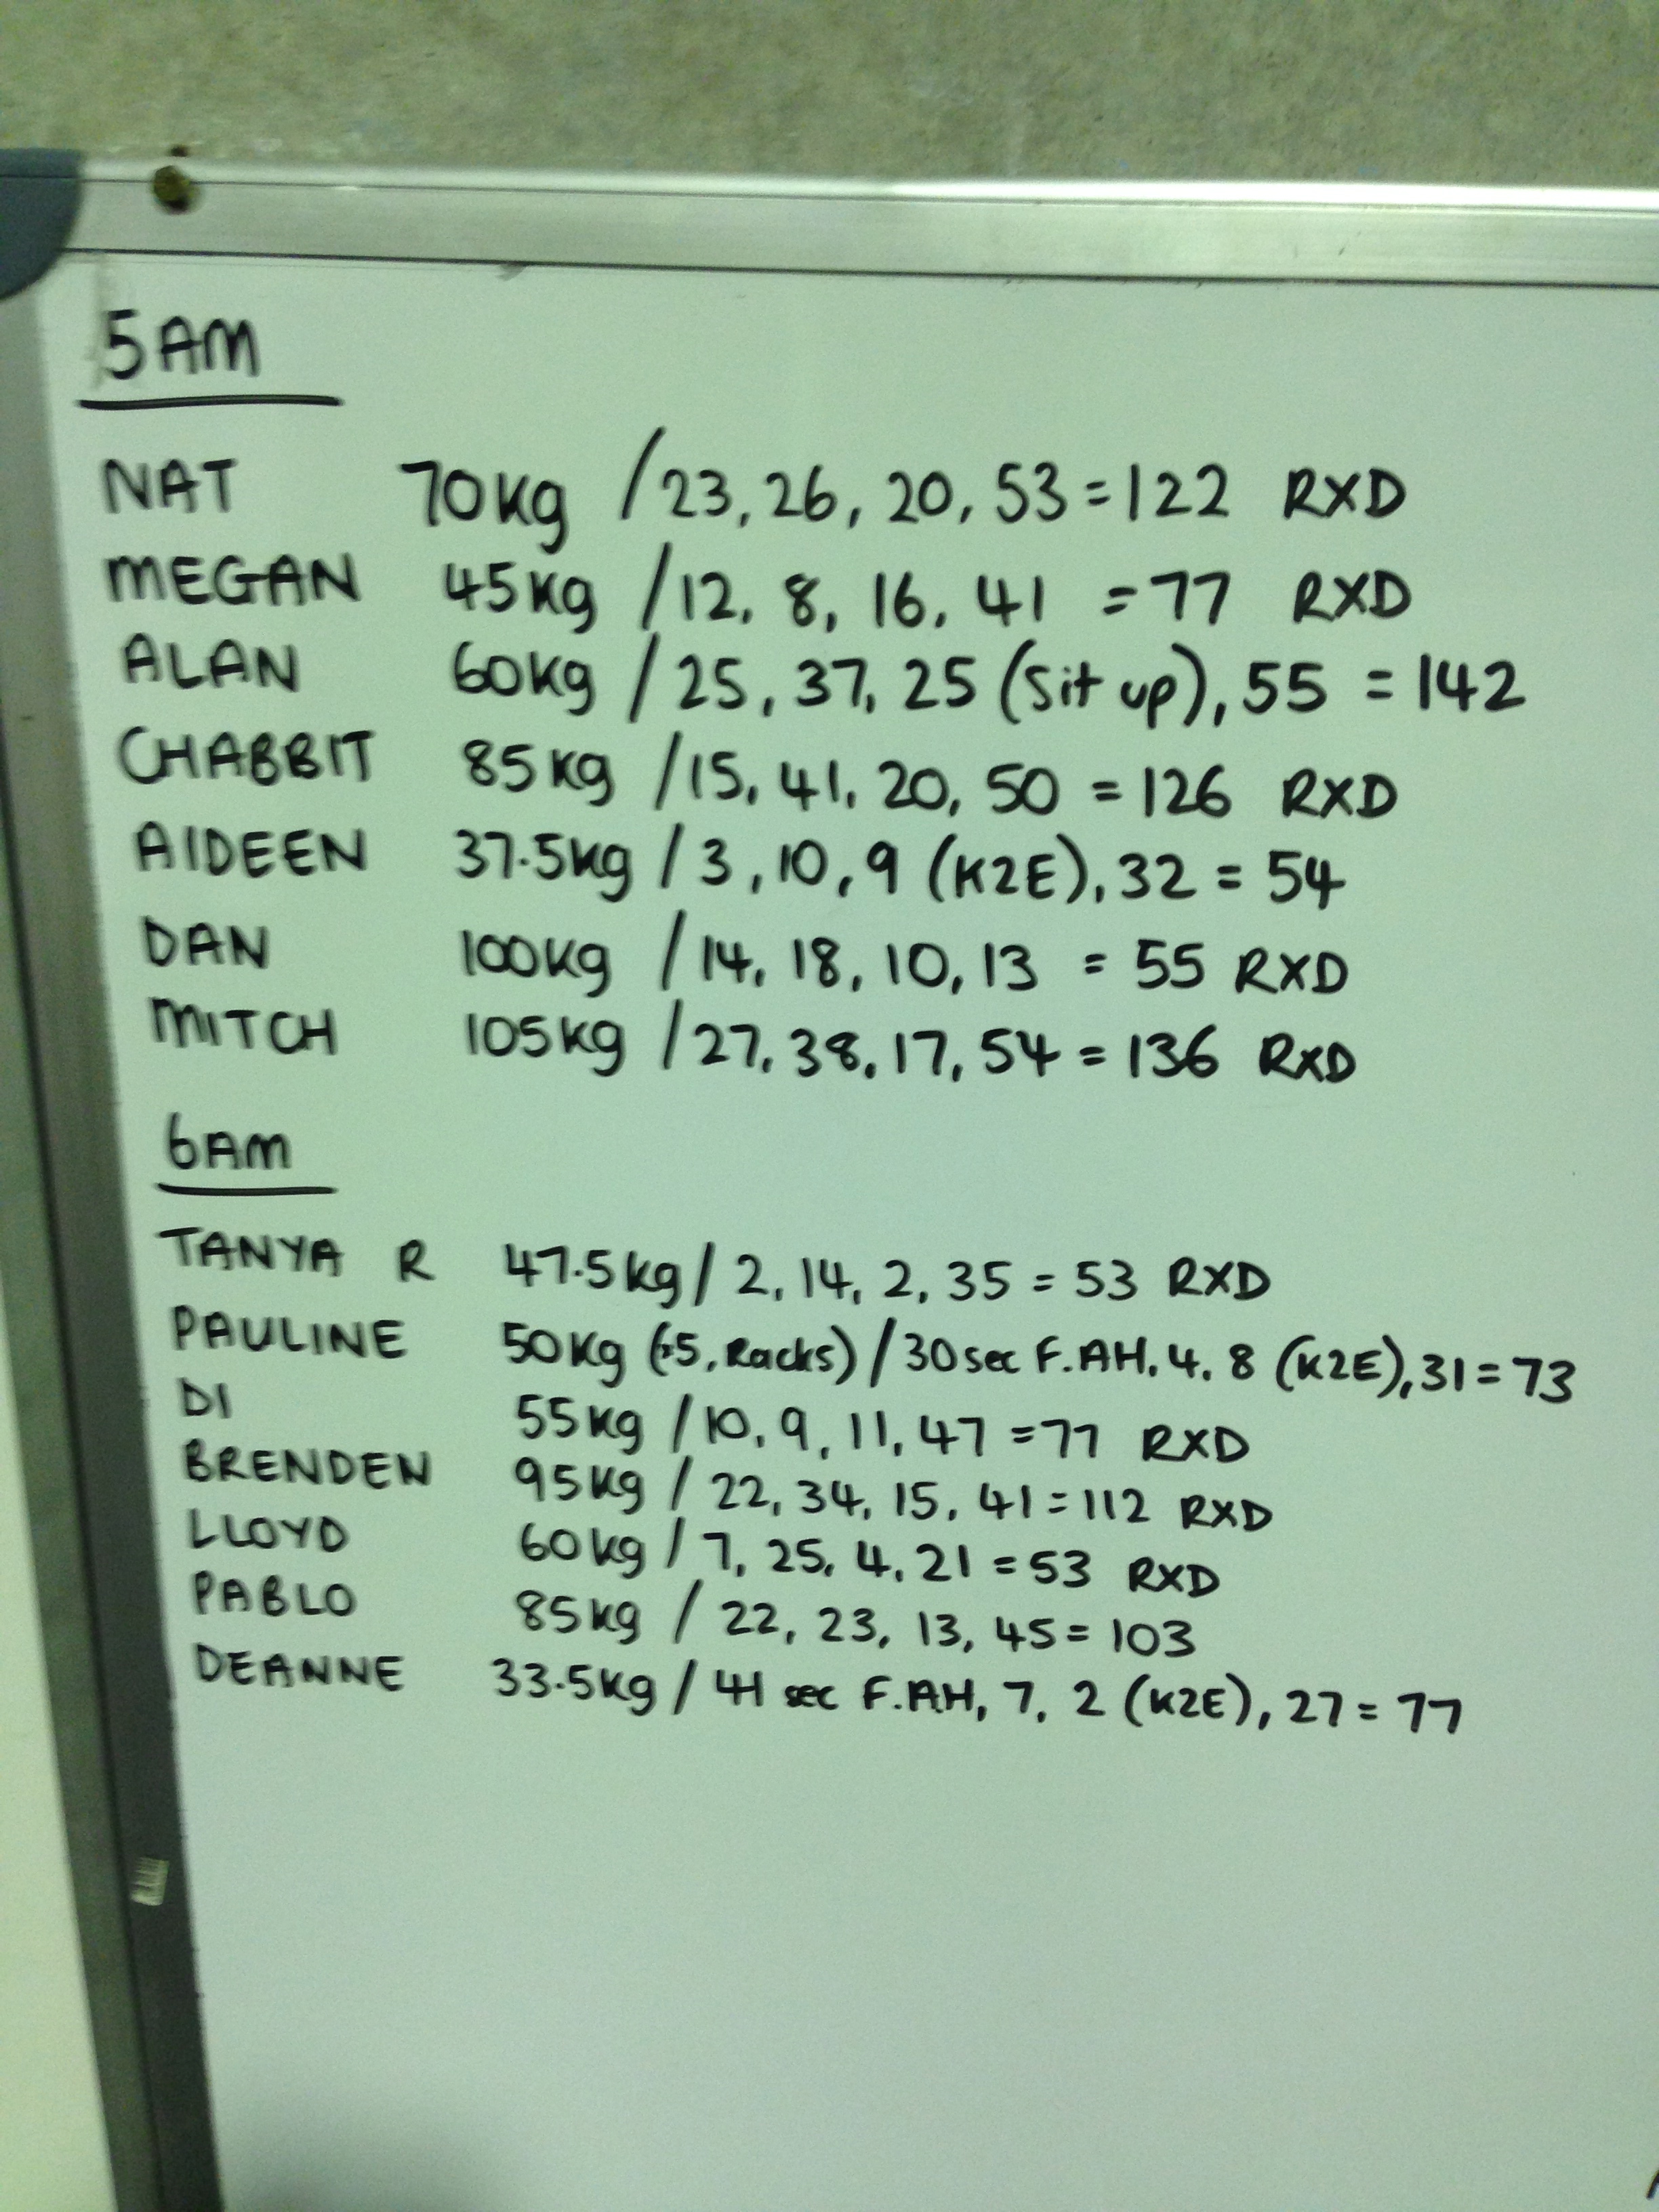
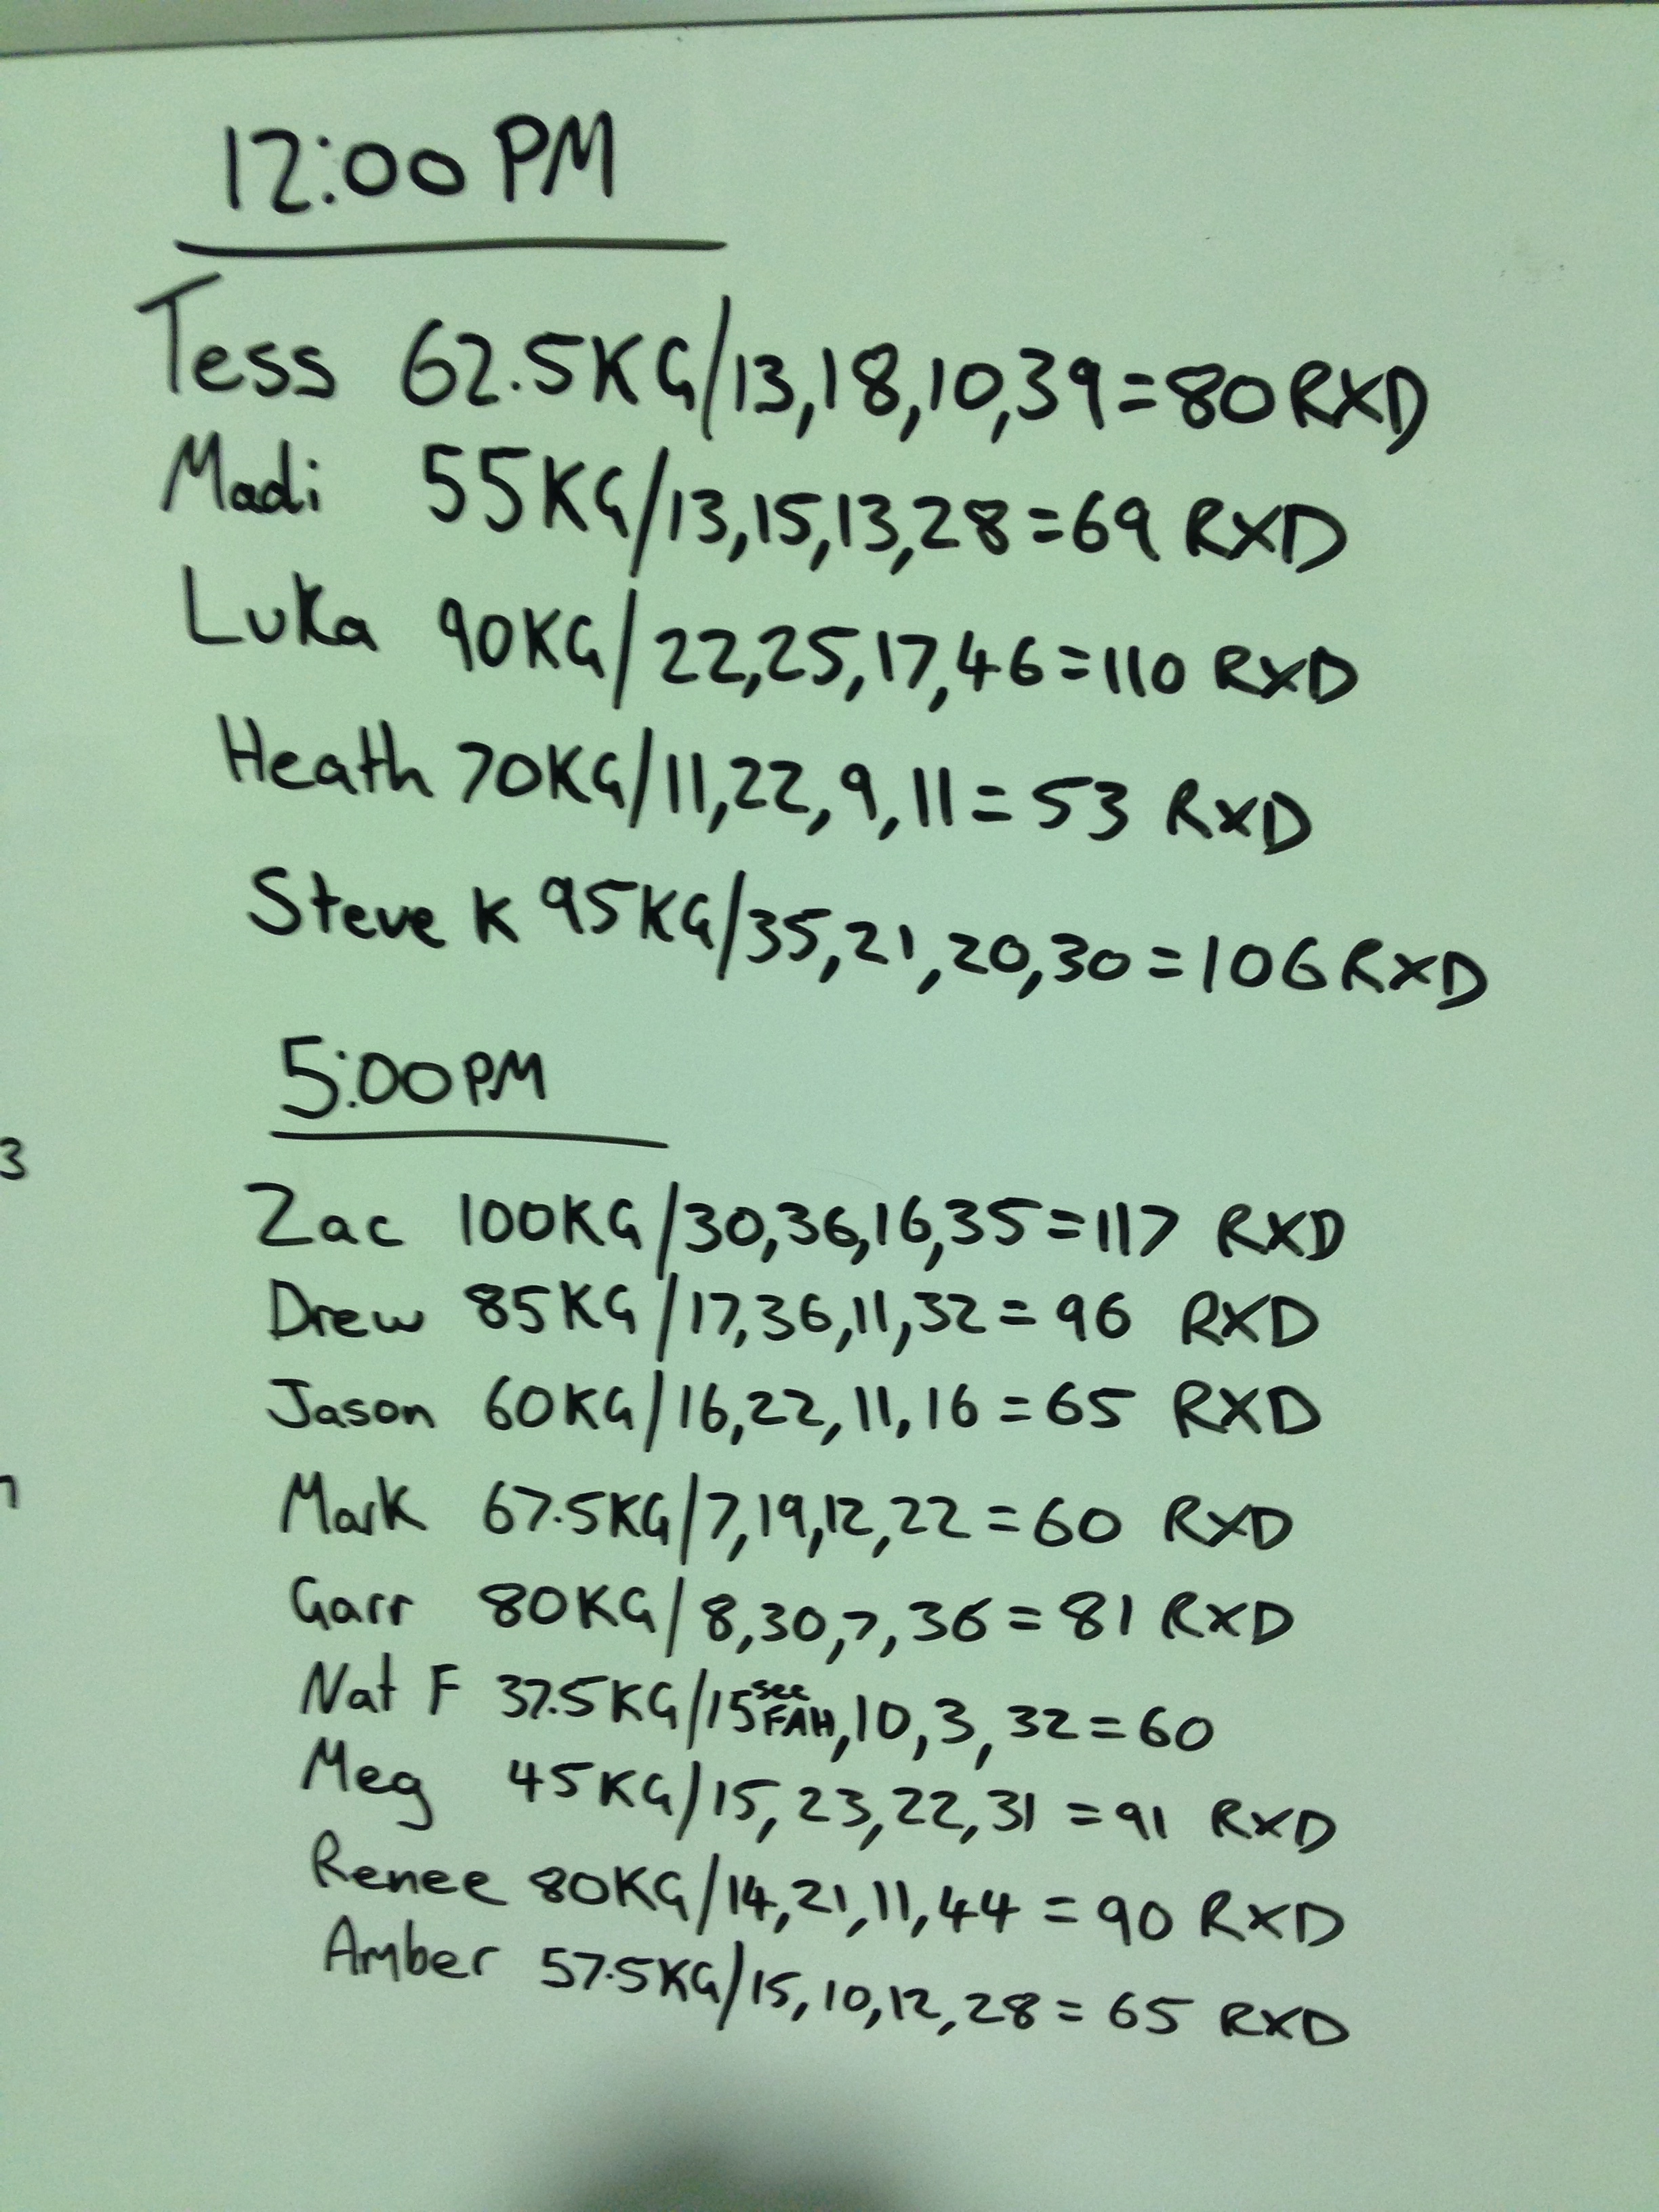
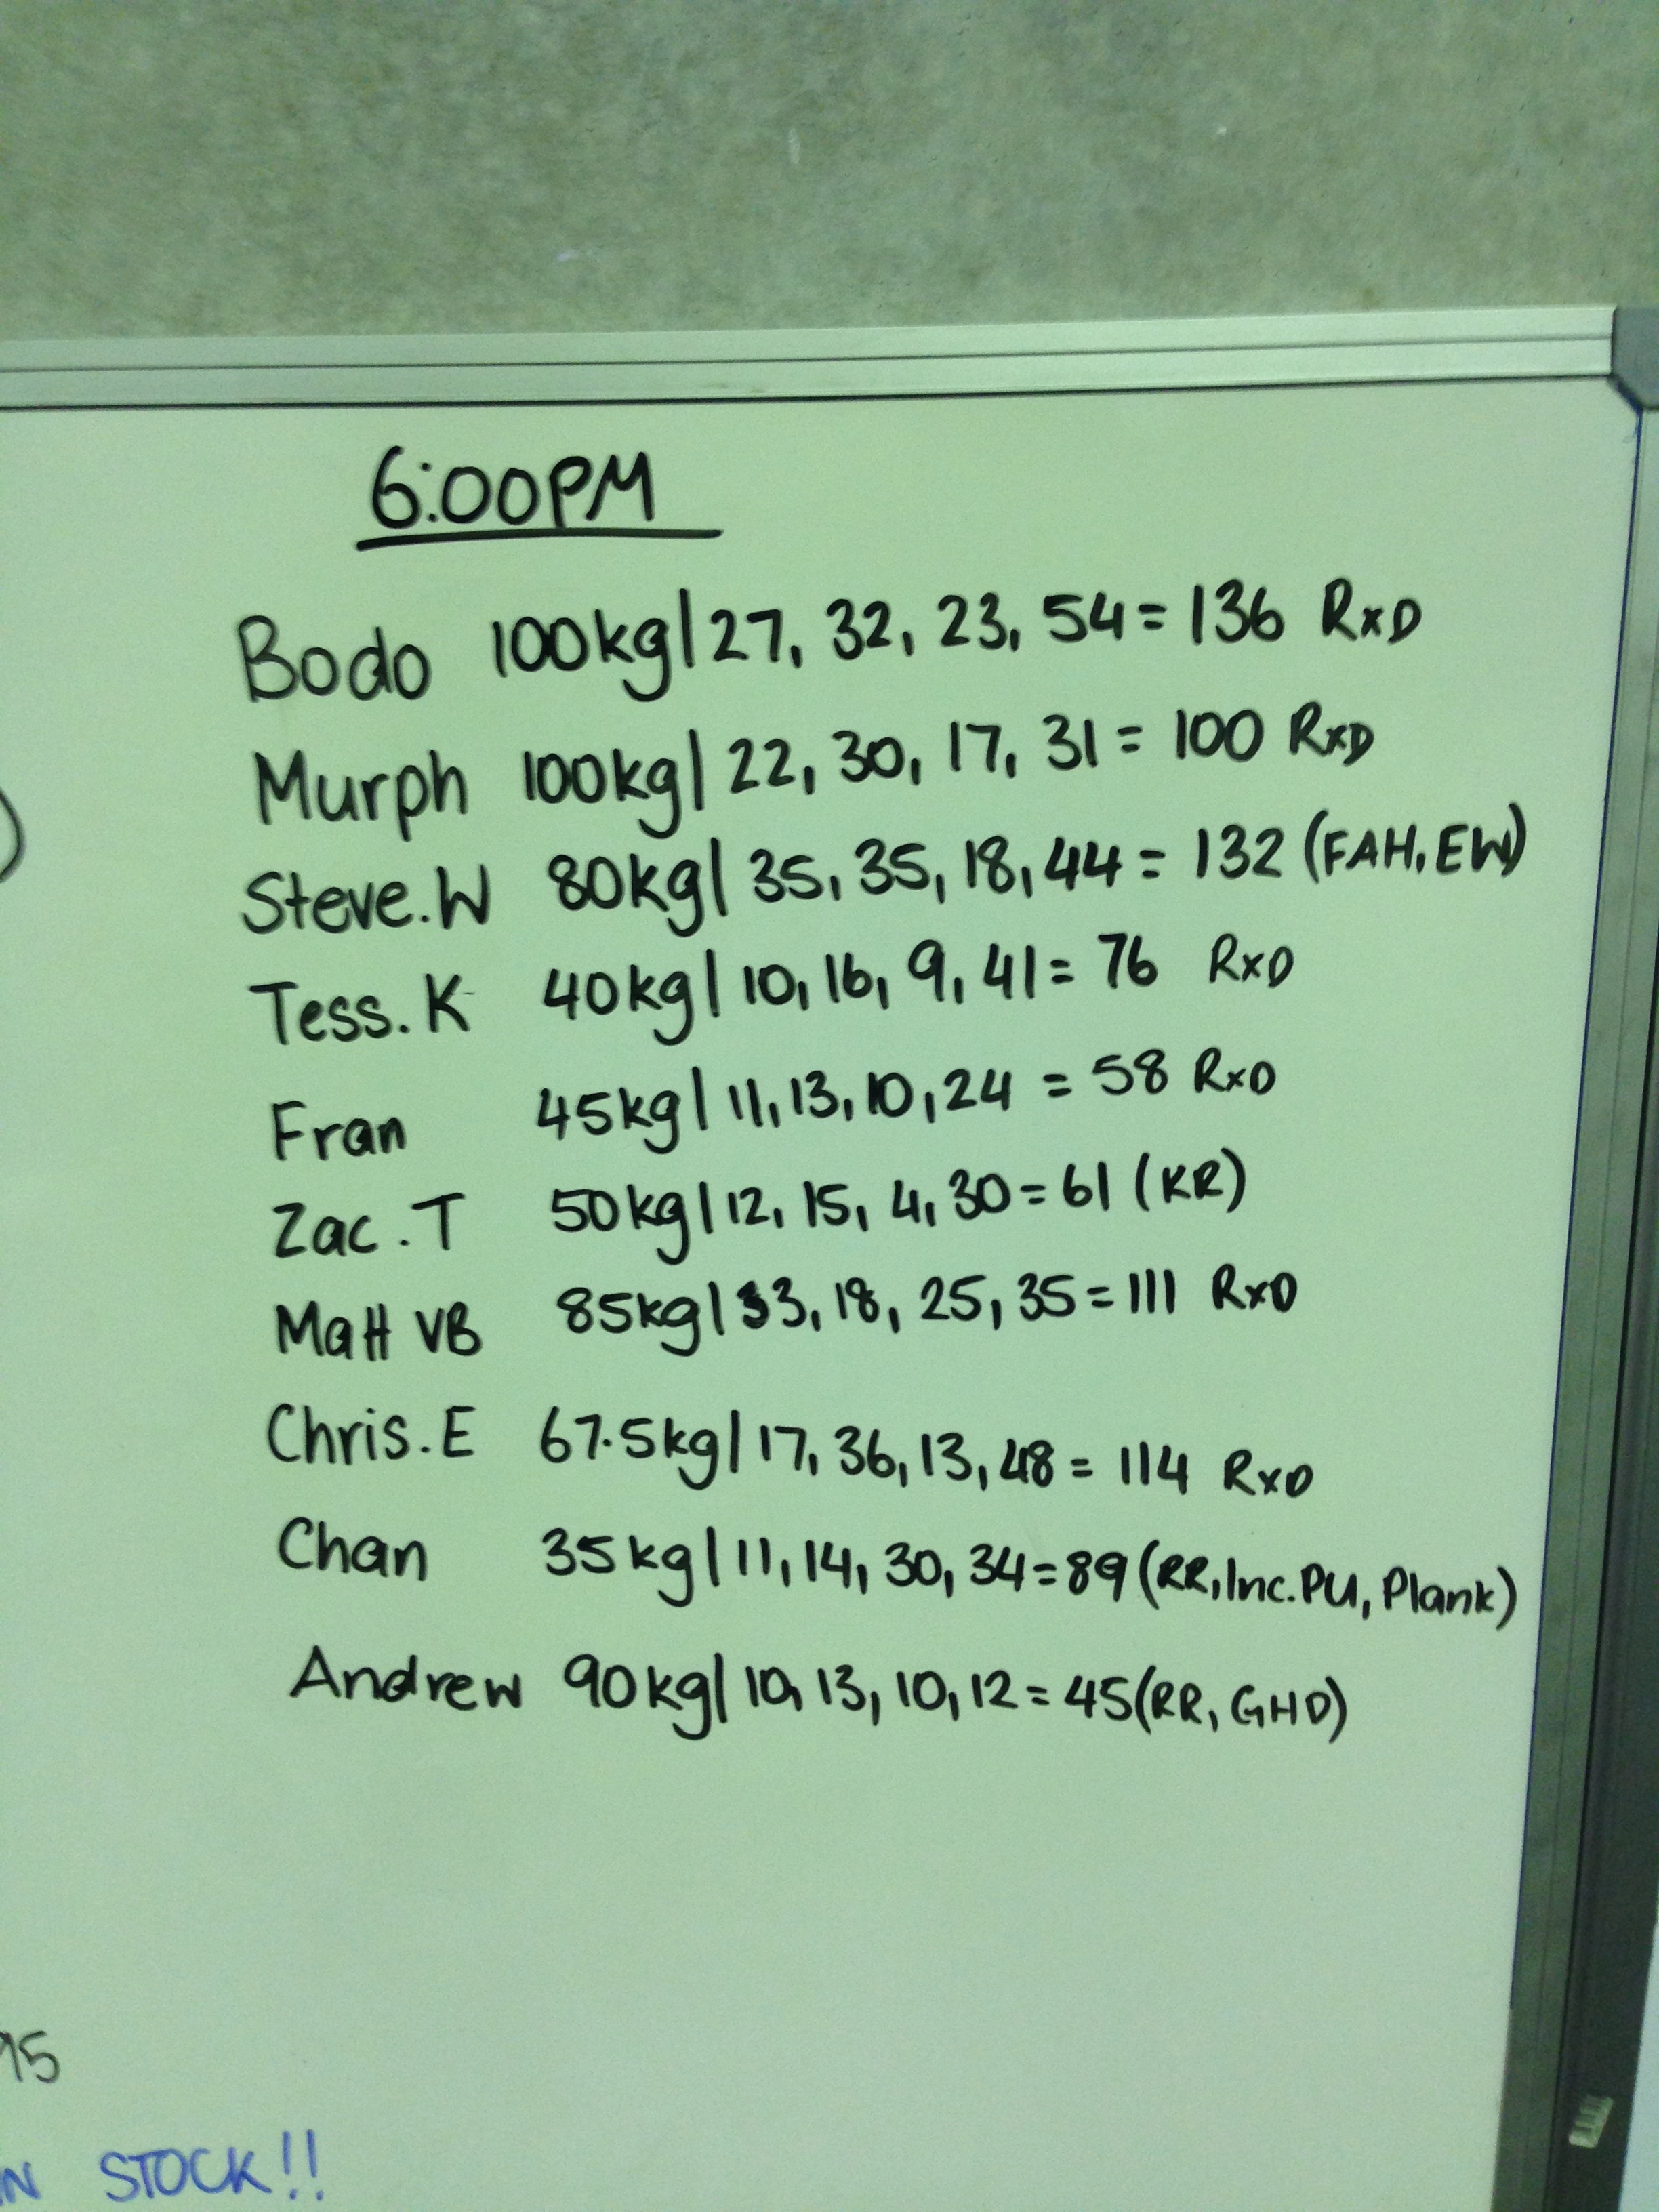
Results:
Chris
Megan
Steve W
Jacko
Marie
Bodo
Nat
Alan
Steve K
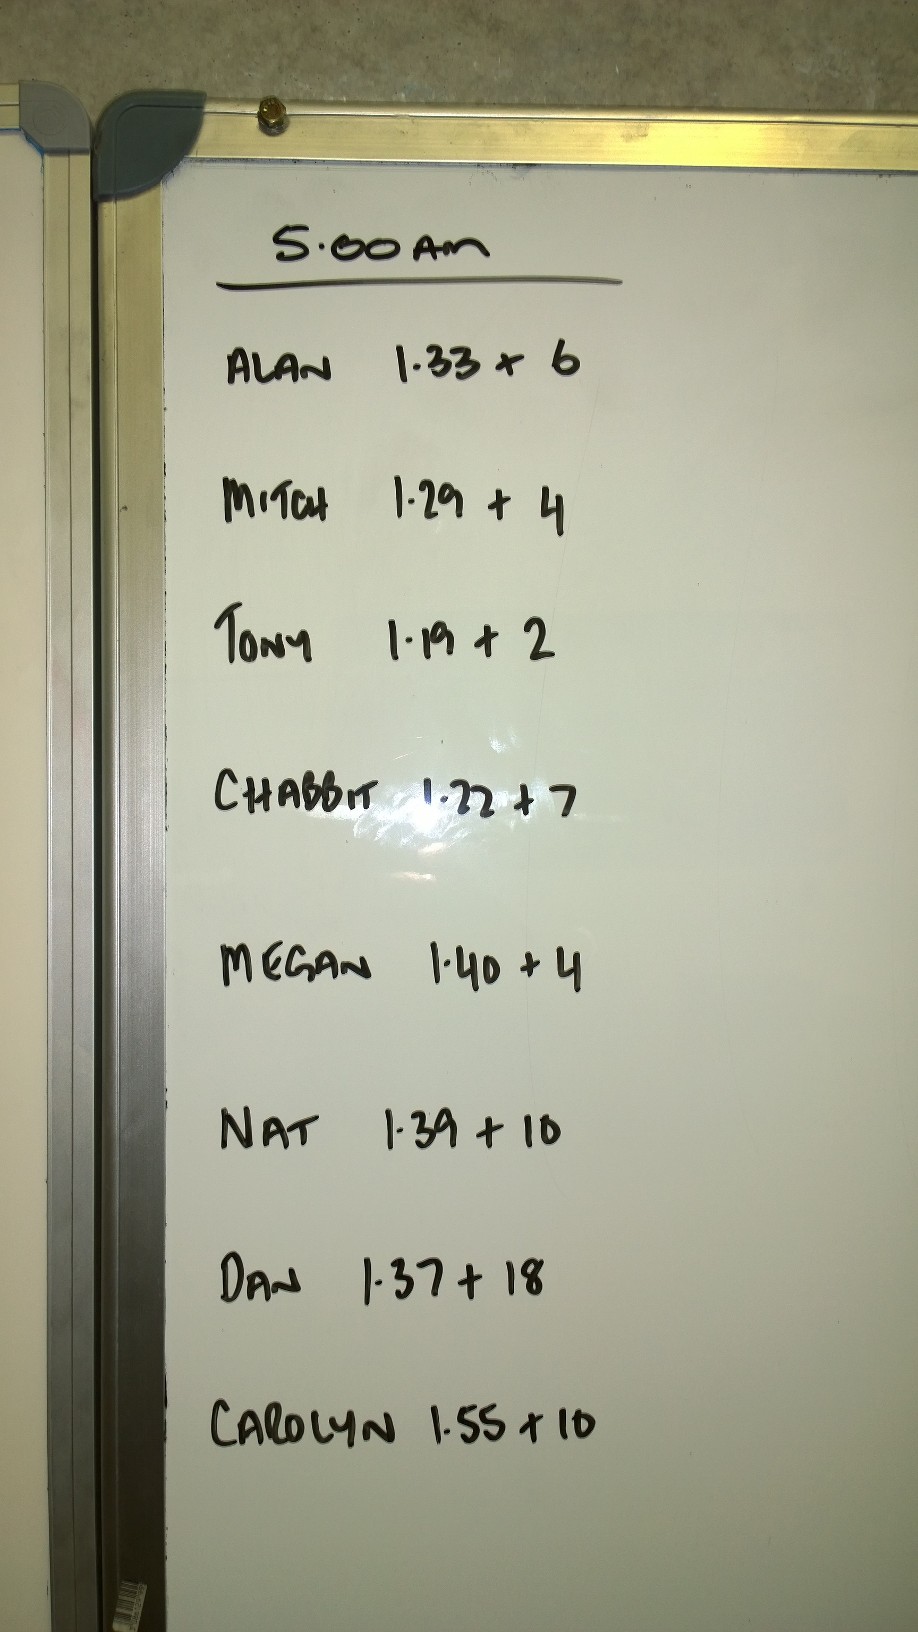
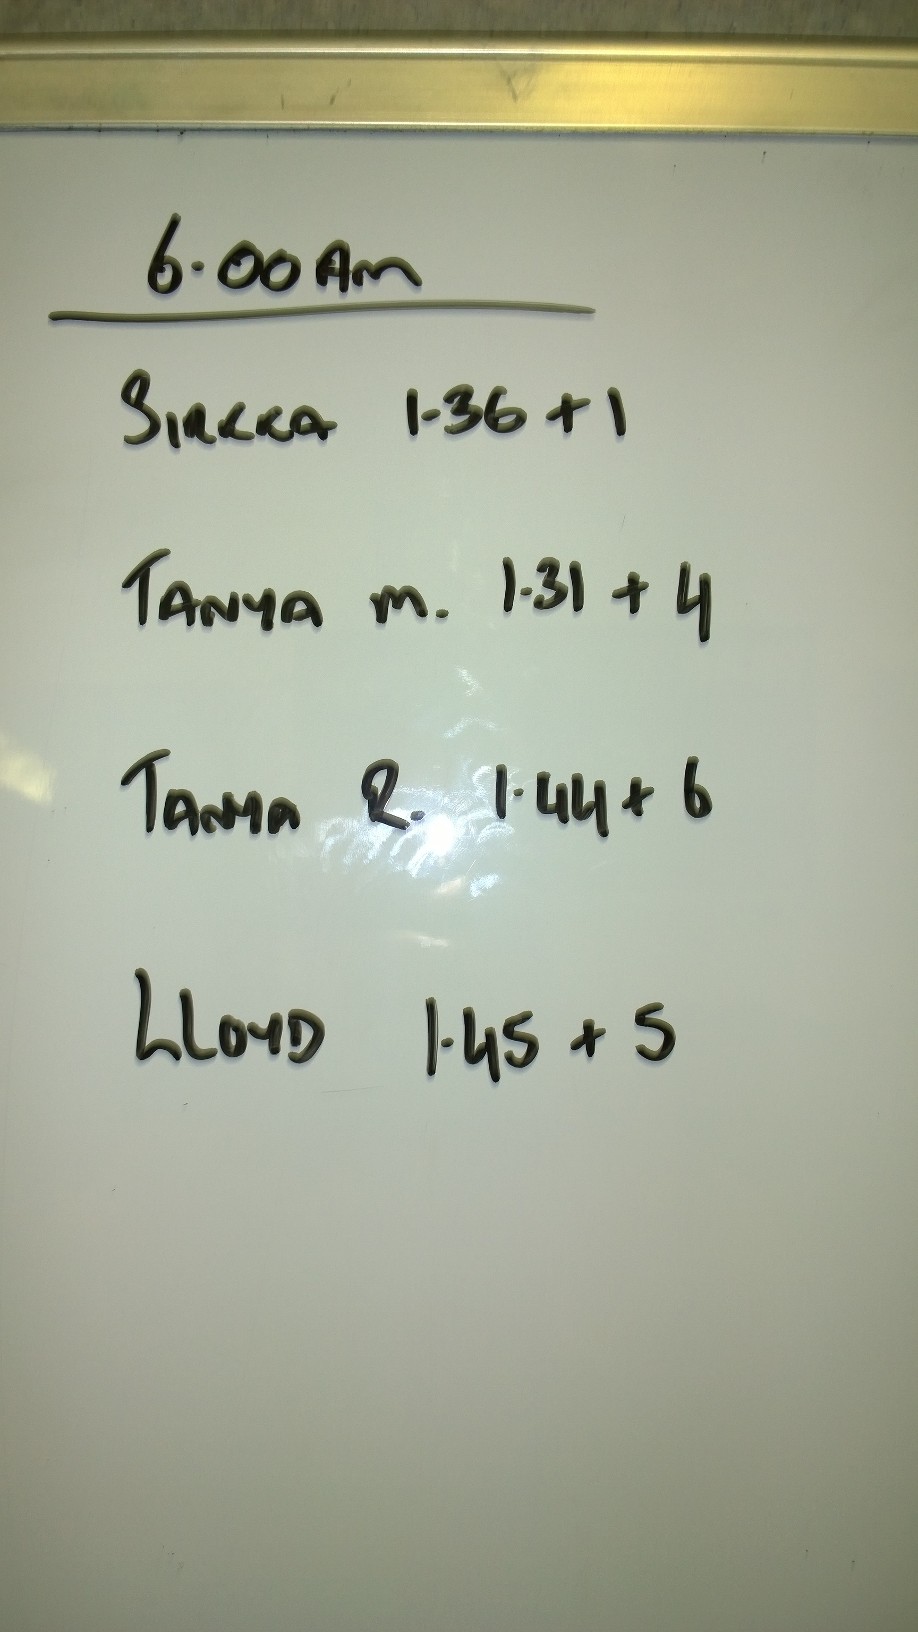
WOD: Thursday
EMOM for 20 minutes:
1 Power Snatch
2 Snatch Balance
3 Overhead Squat
*The aim for this workout is to increment your weight four times across the 20 rounds. For rounds 1-5 use a load that you can move easily (about 50% of 1RM Snatch) and then add weight at rounds 6-10, 11-15 and 16-20. The last 5 rounds should be close to maximal with consideration given to the volume or work and movements used.
WOD: Wednesday
6 x 400m Run
*Aim not to deviate more than 10 seconds from your fastest time.
*Work:Rest = 1:1
Before you decide to make today a rest day have a think about the overall concept of what we’re training for – increased ability in a wide variety of disciplines. This means that we must workout short and long, light and heavy, inside and outside, in the cold and the heat and with a broad range of exercises.
Like it or not, running is one of the most effective ways to develop cardio vascular conditioning and represents a weakness in most peoples repertoire. So, ignore that little voice in your head that is telling you otherwise and get your running shoes on!
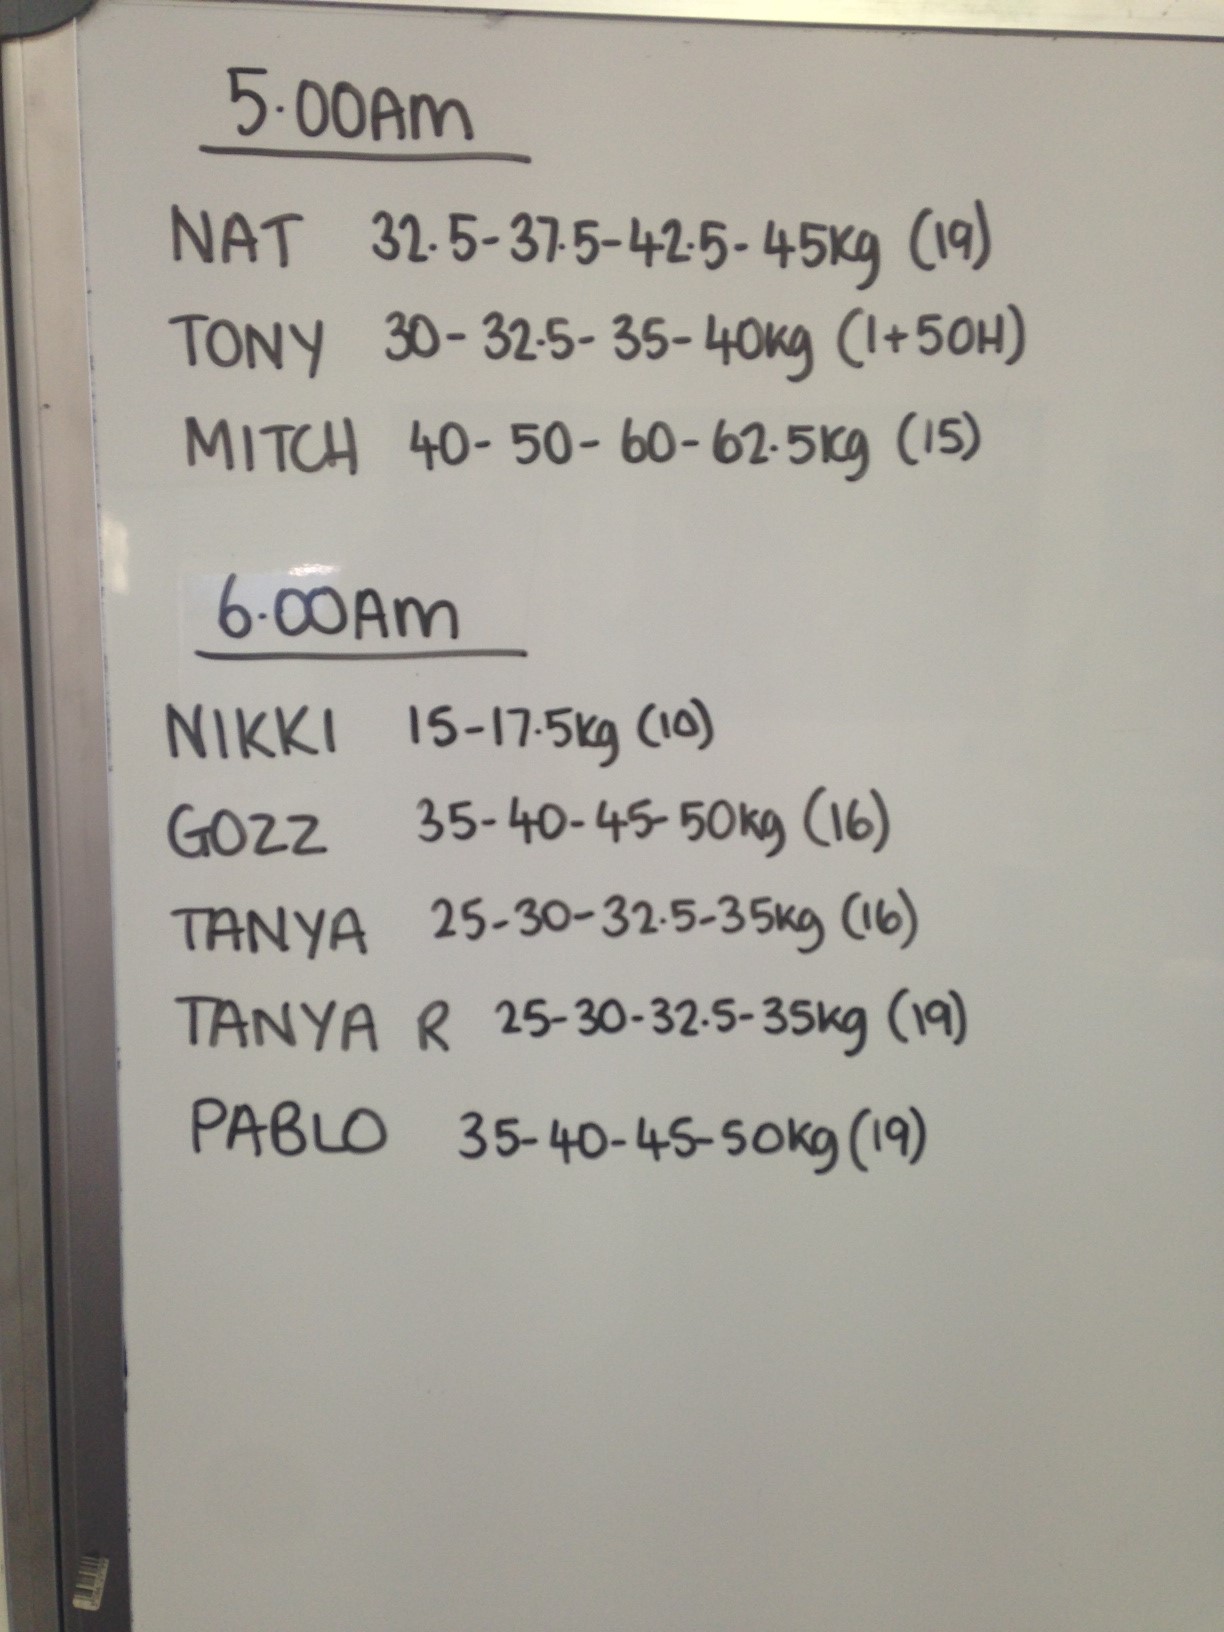
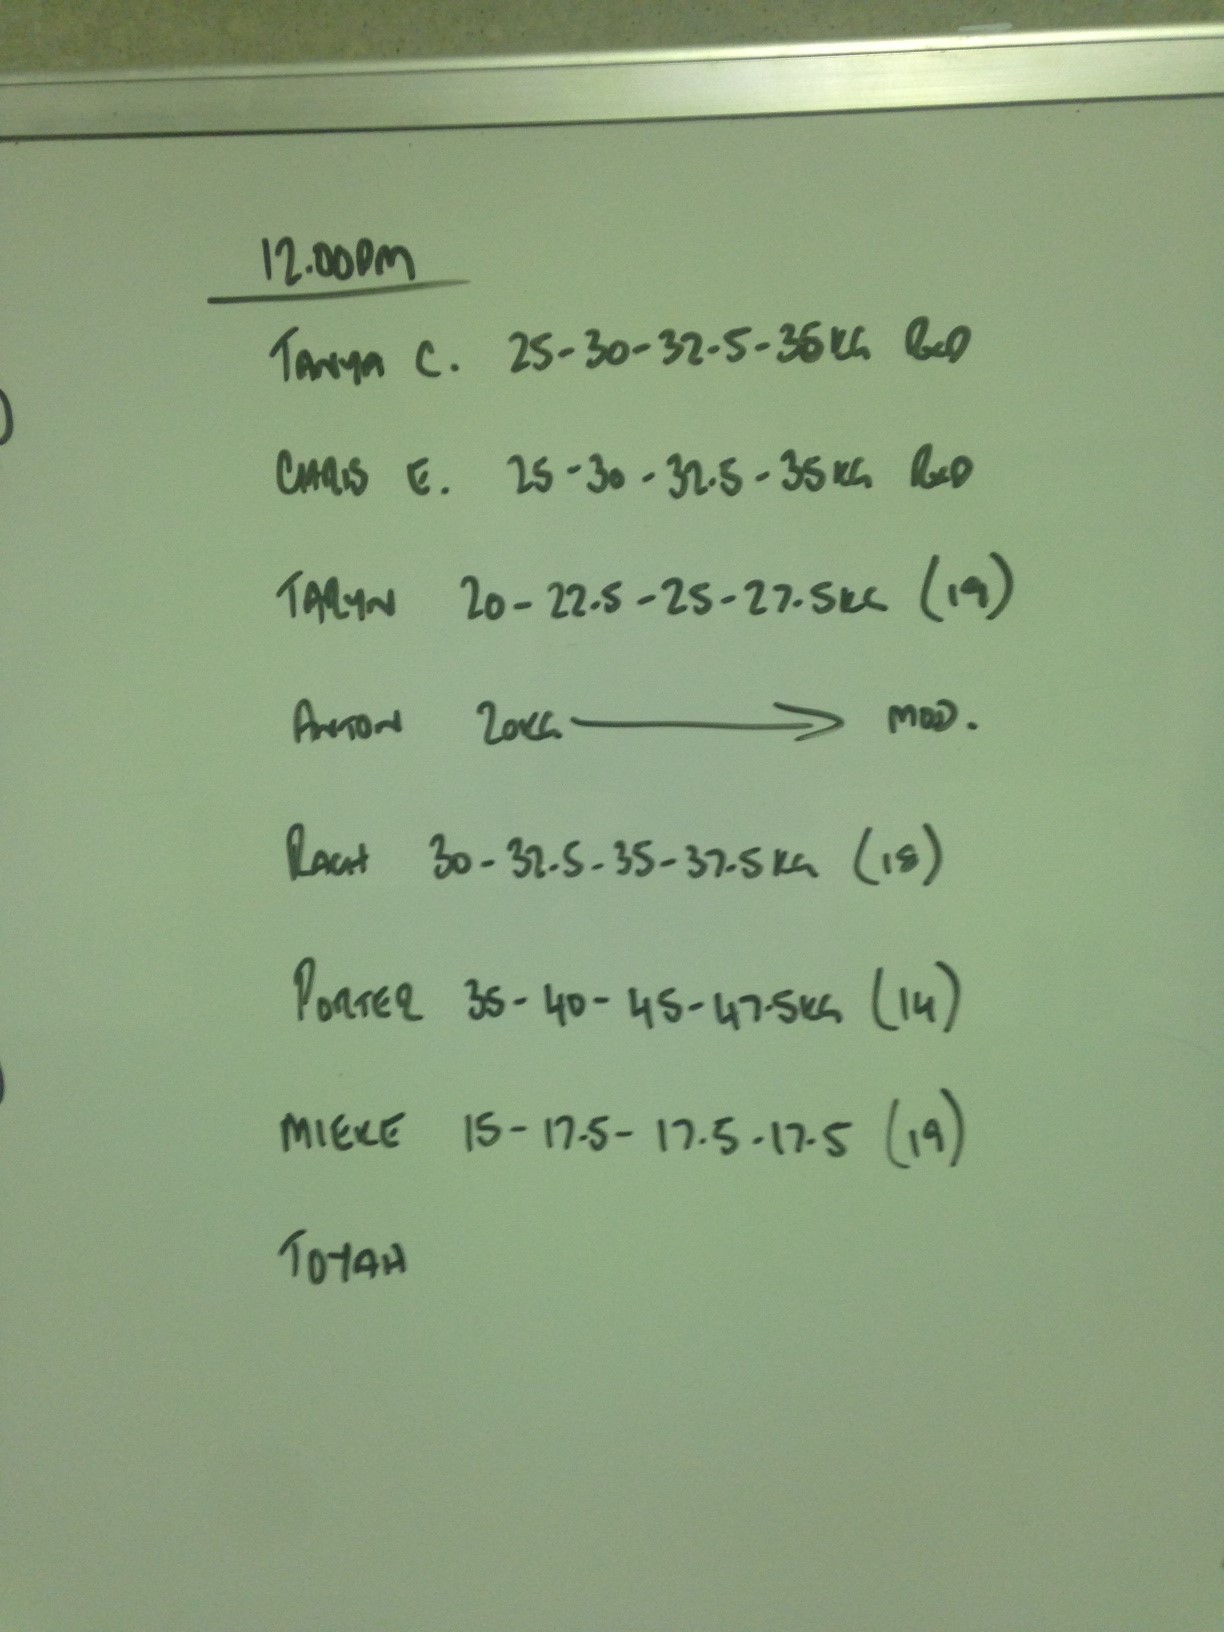
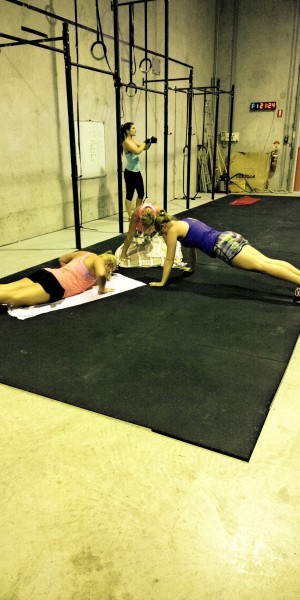
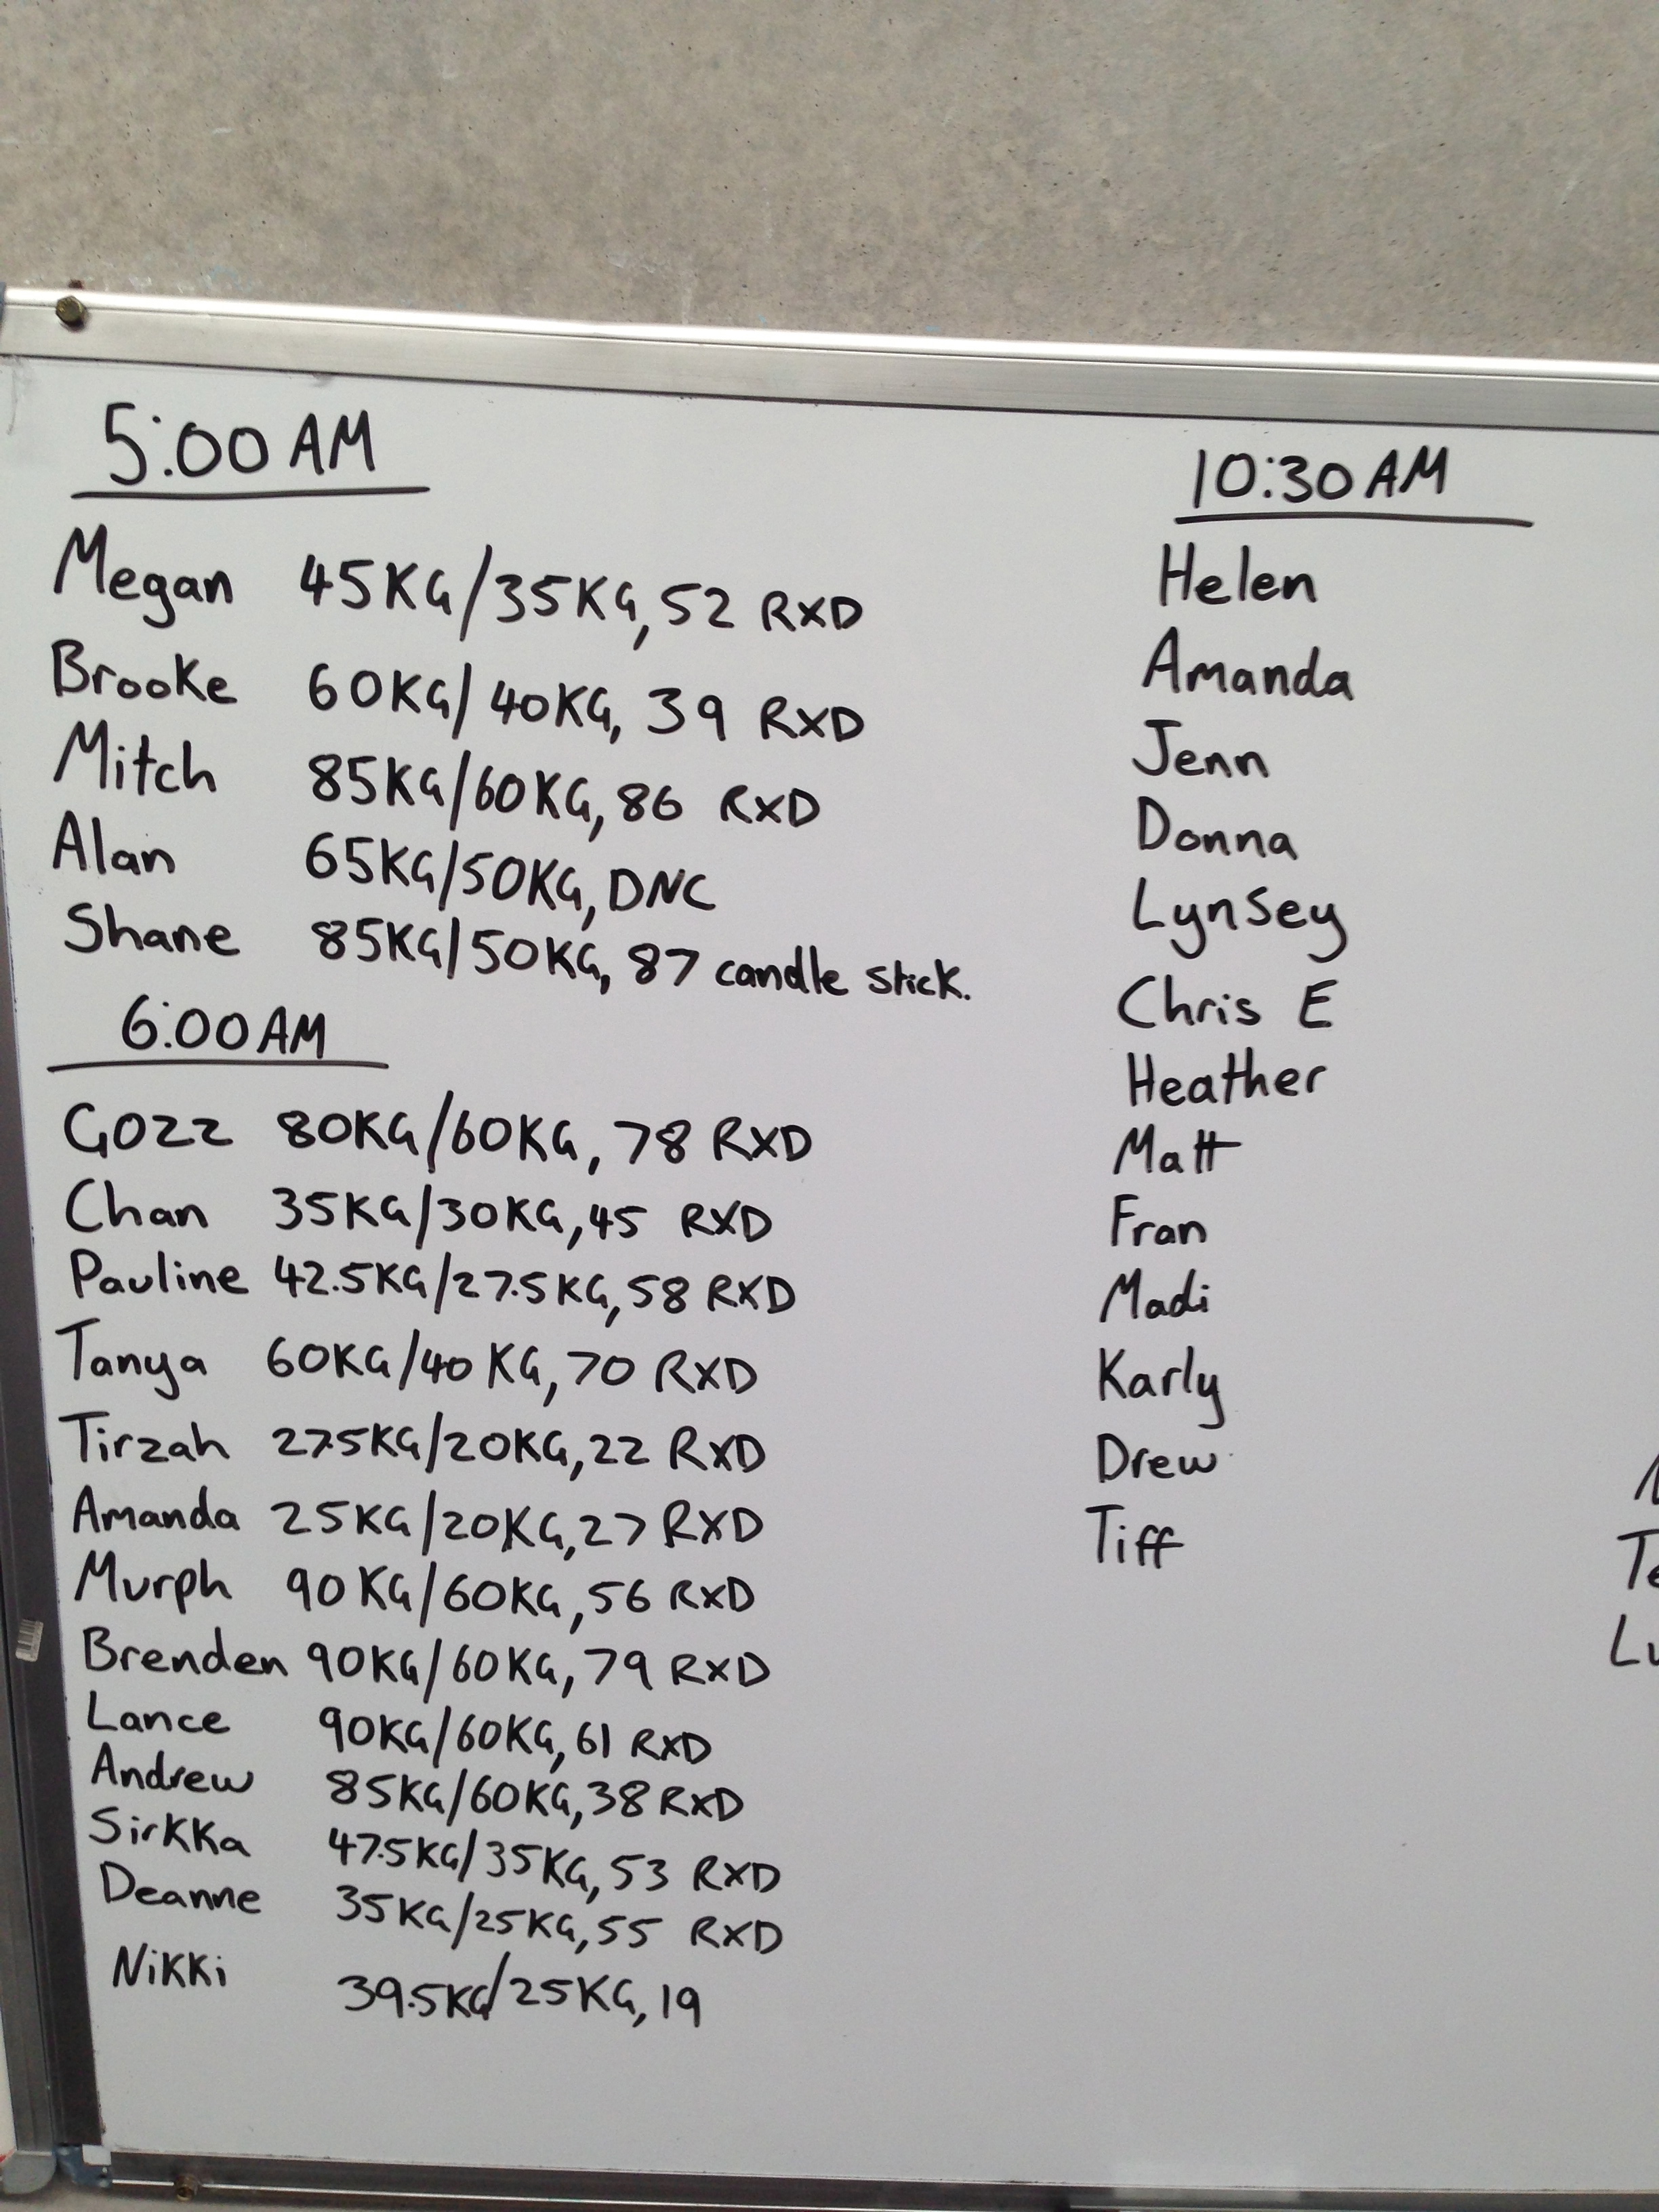
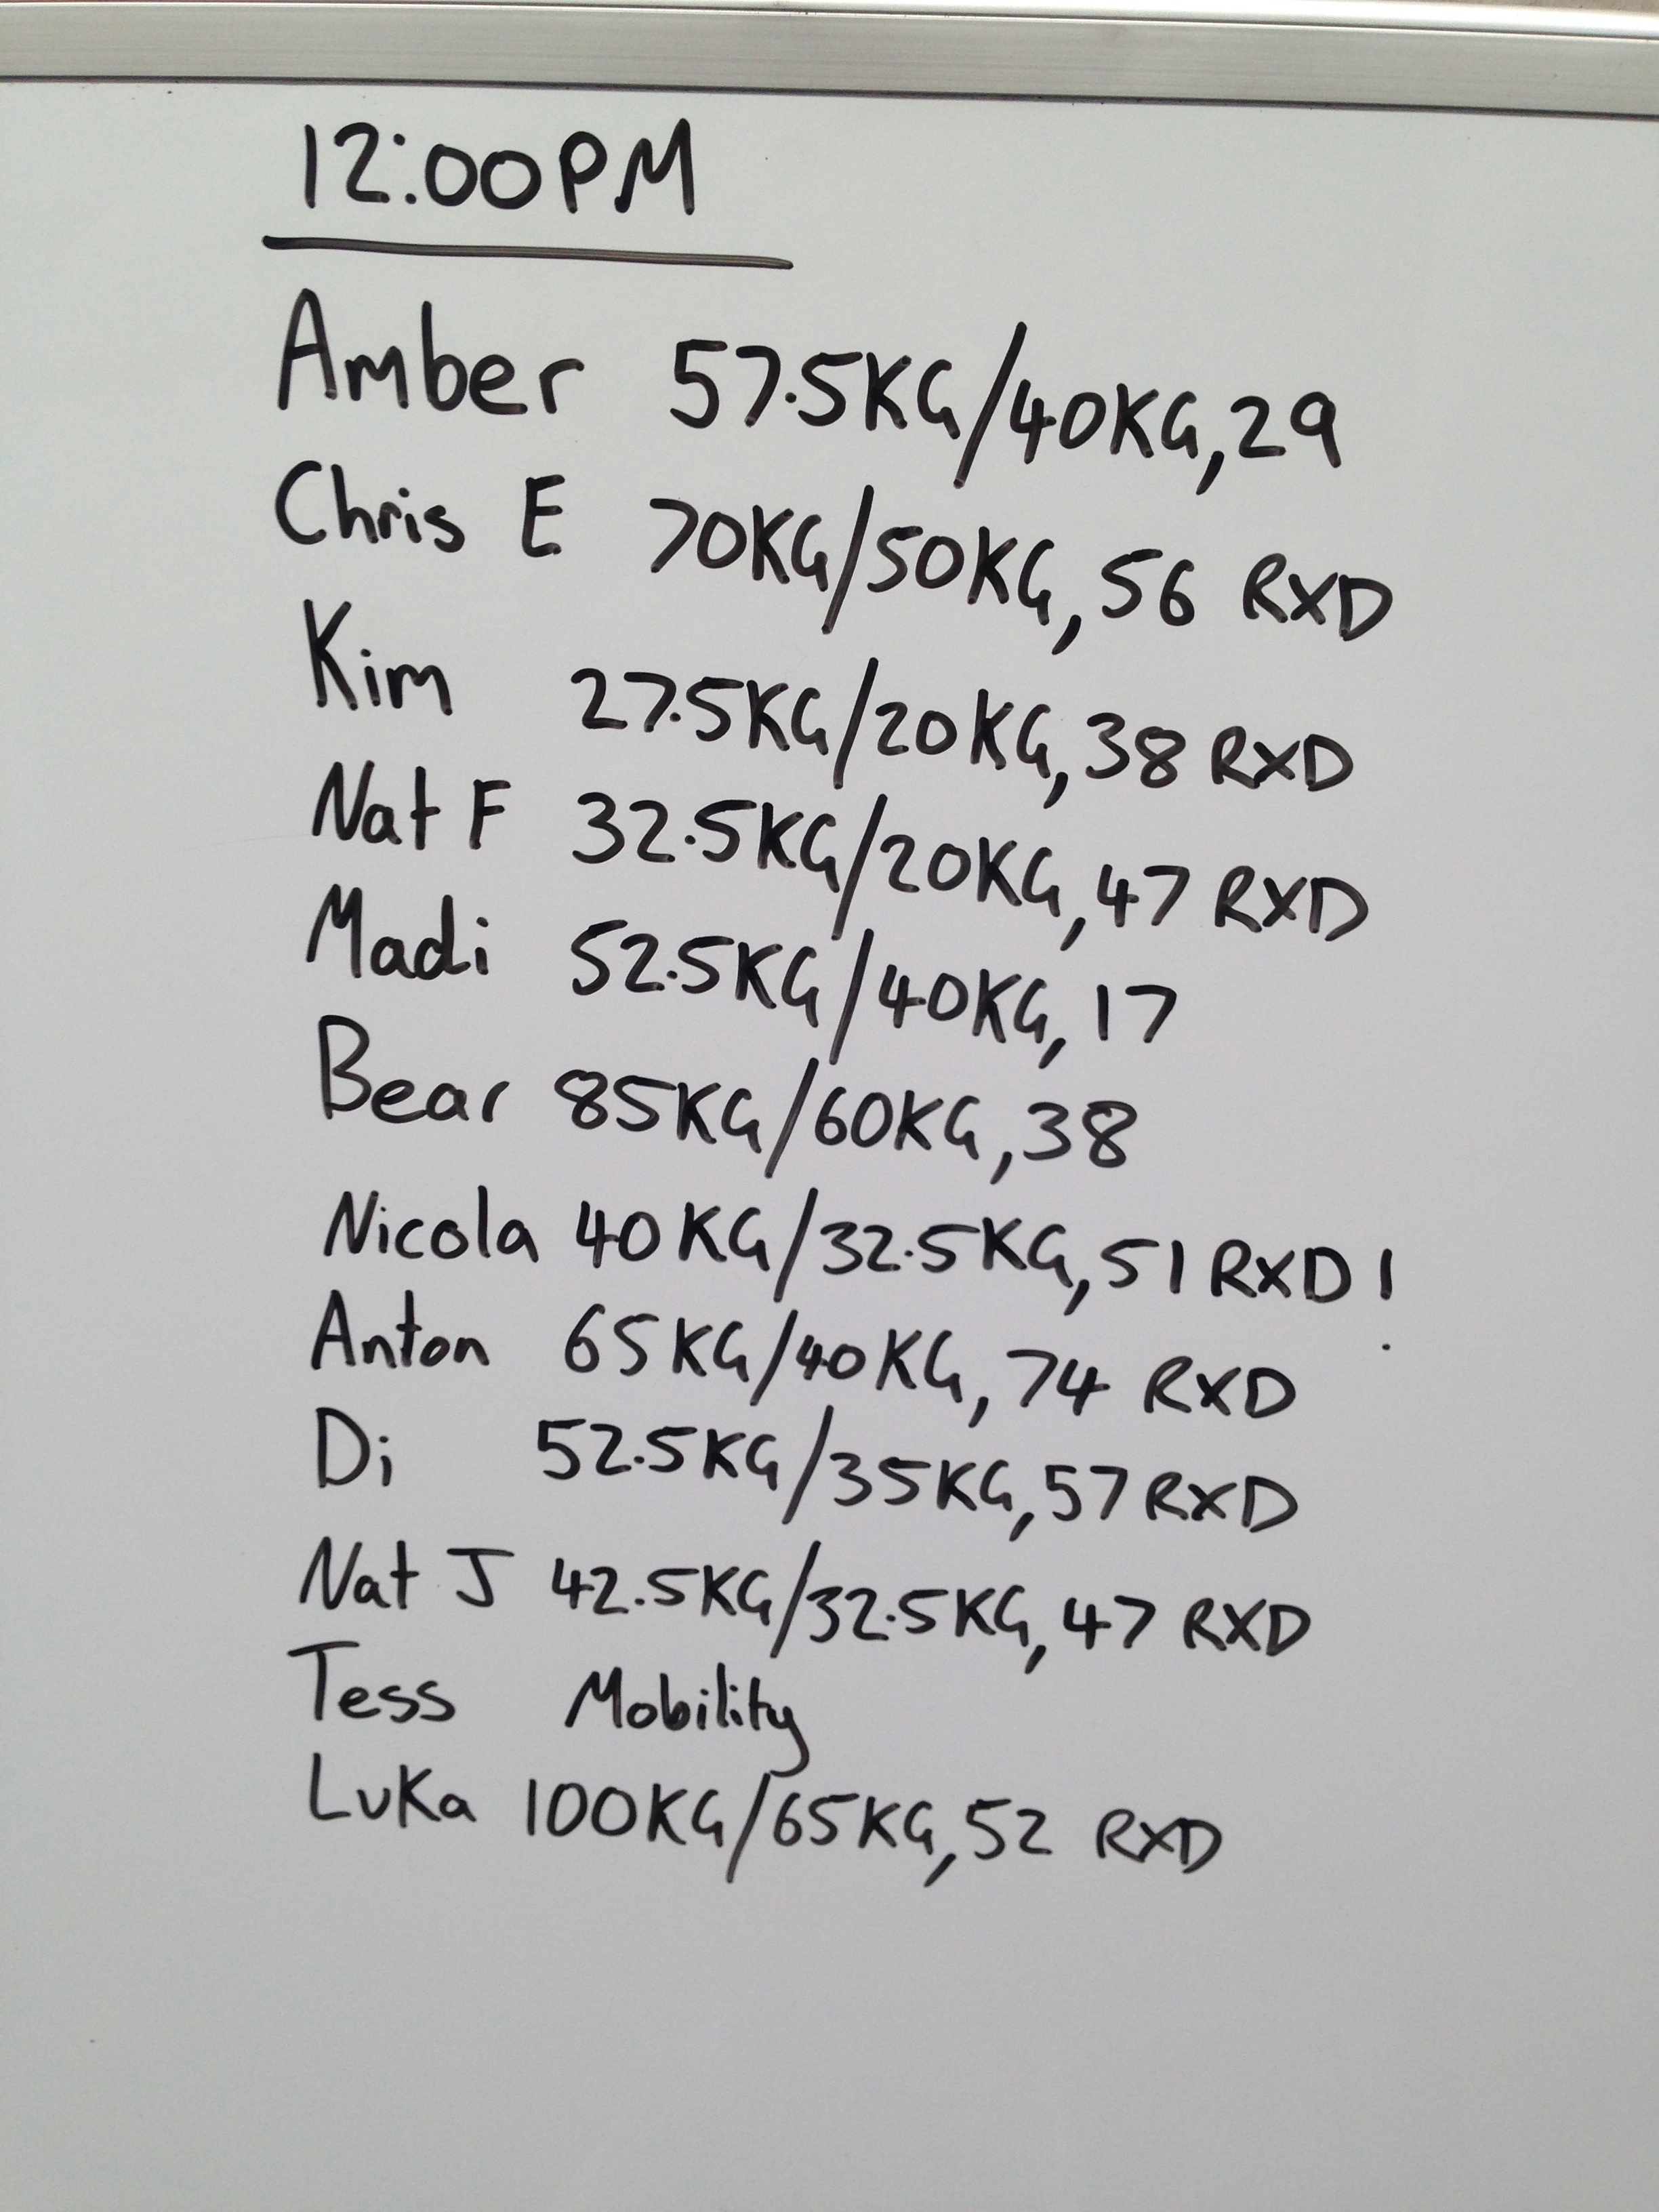
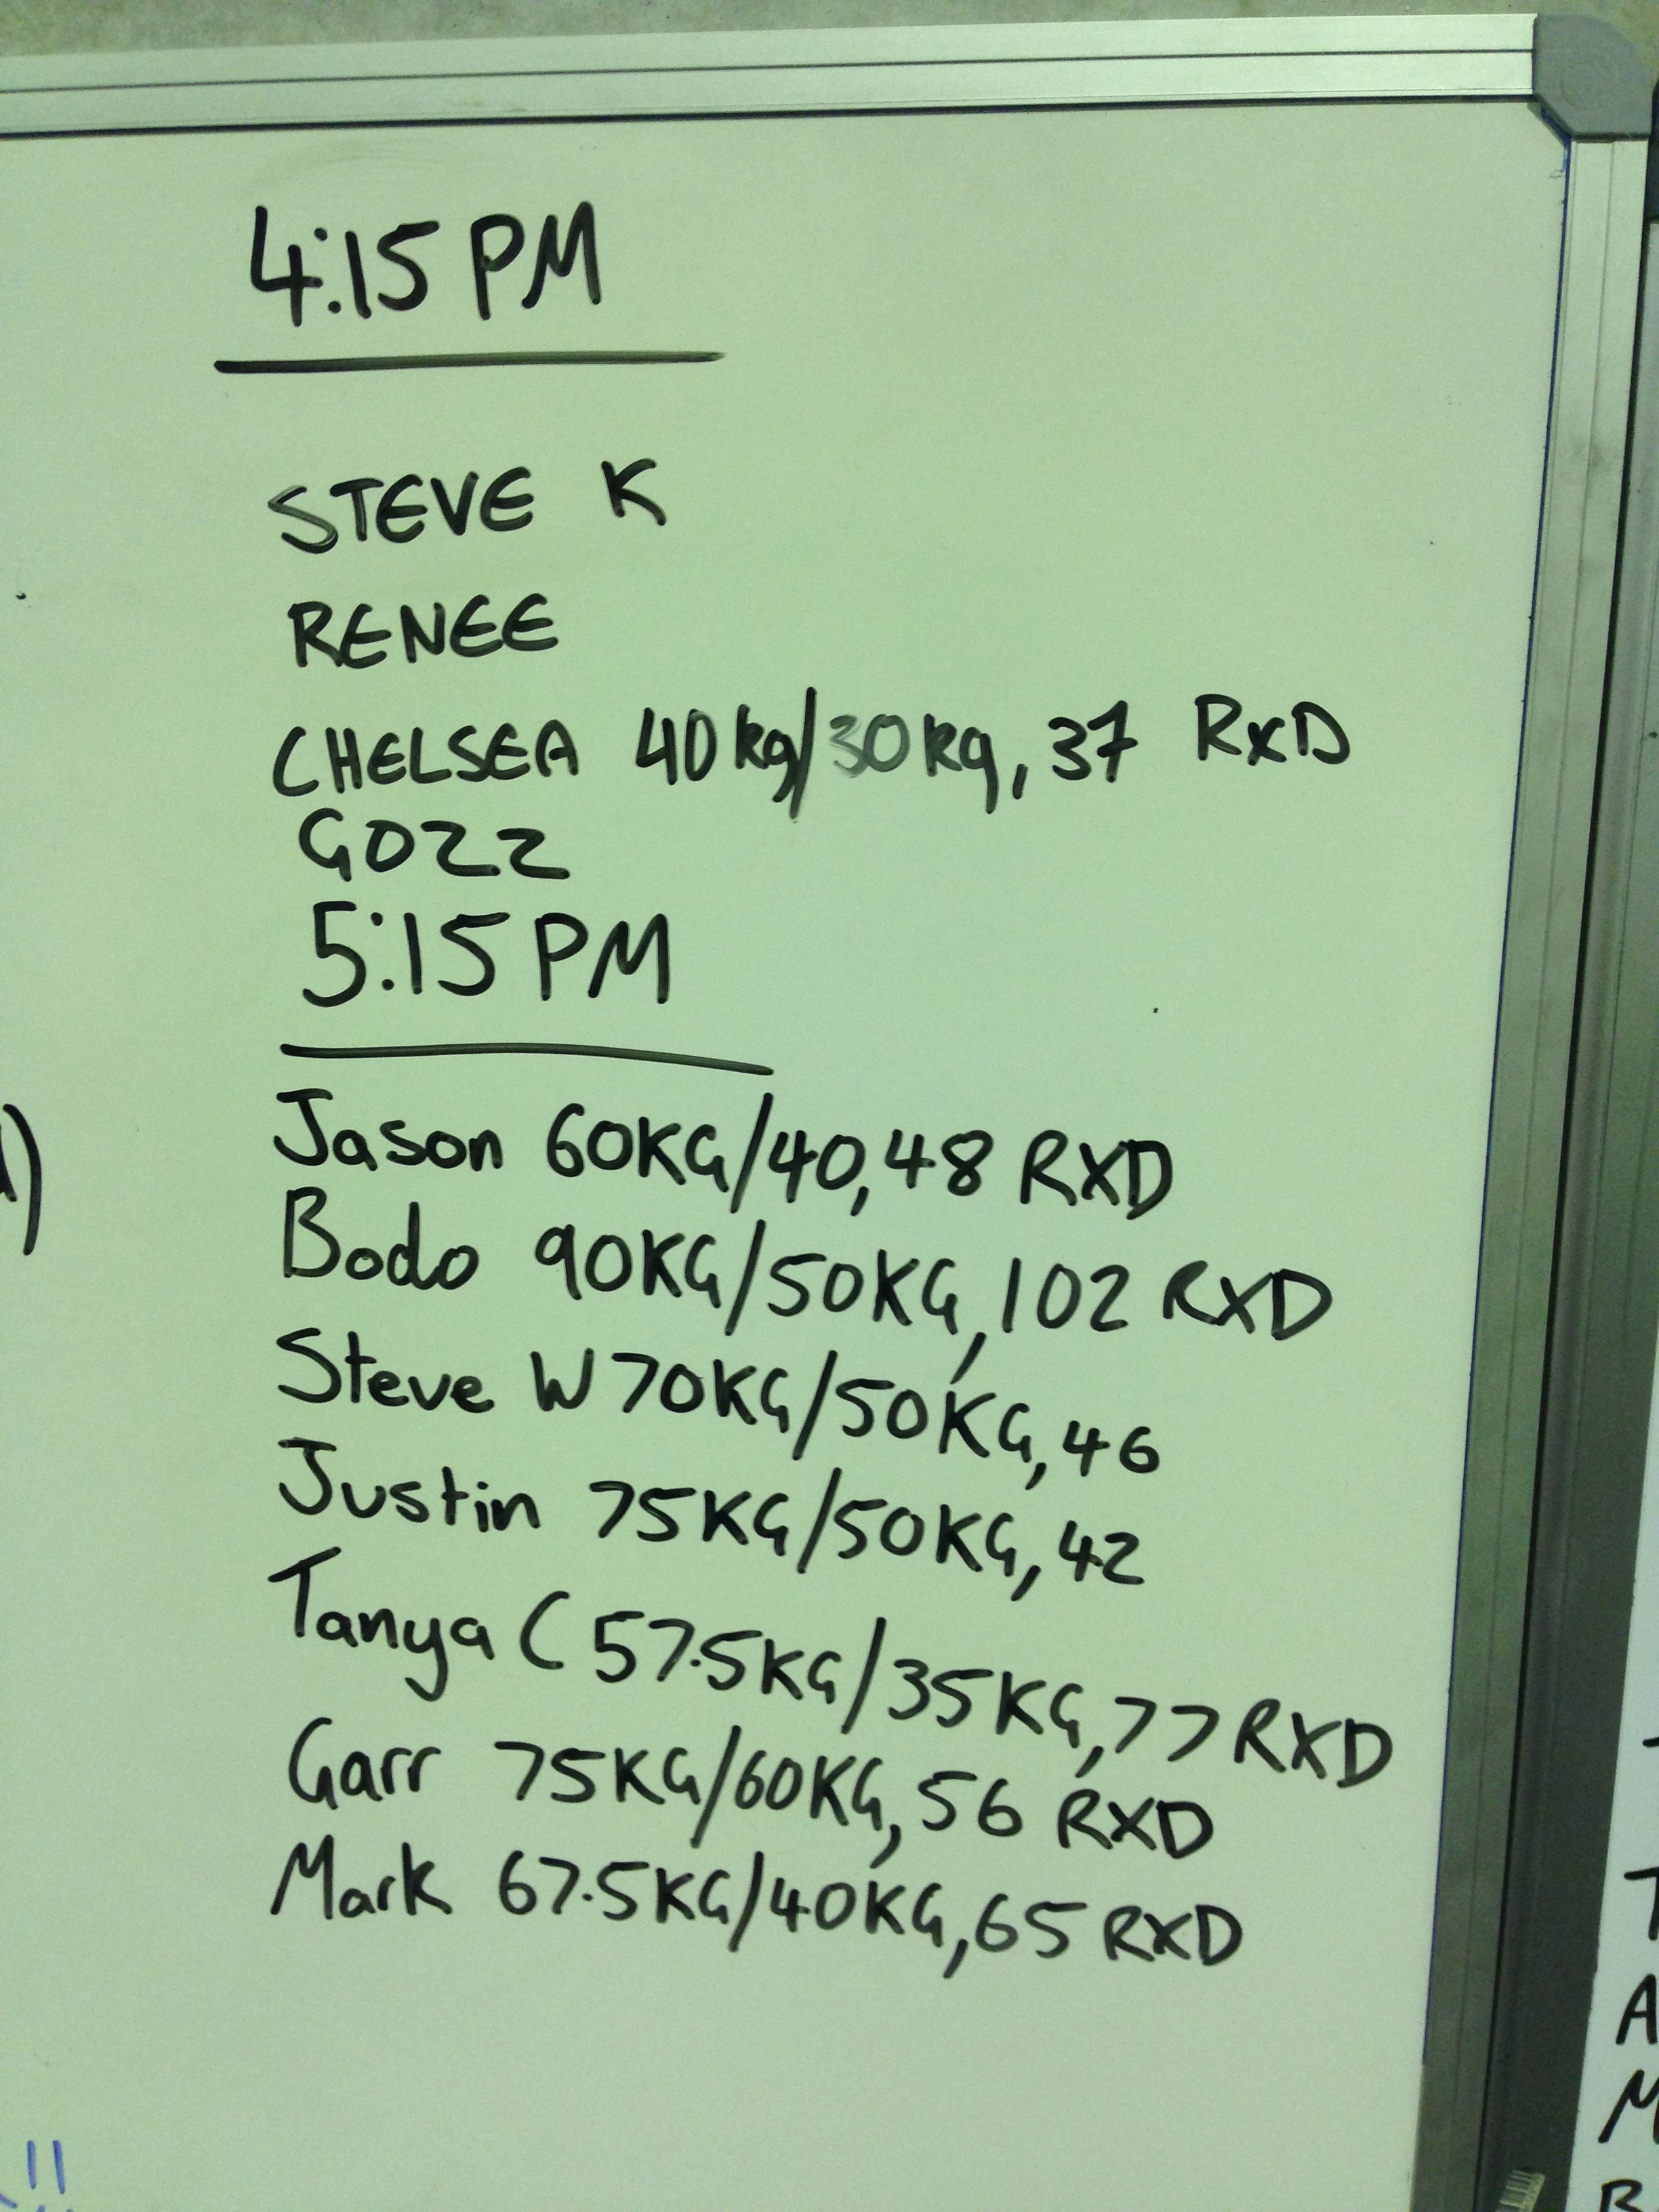
WOD: Tuesday
Happy Birthday to Jesse Saliba today!
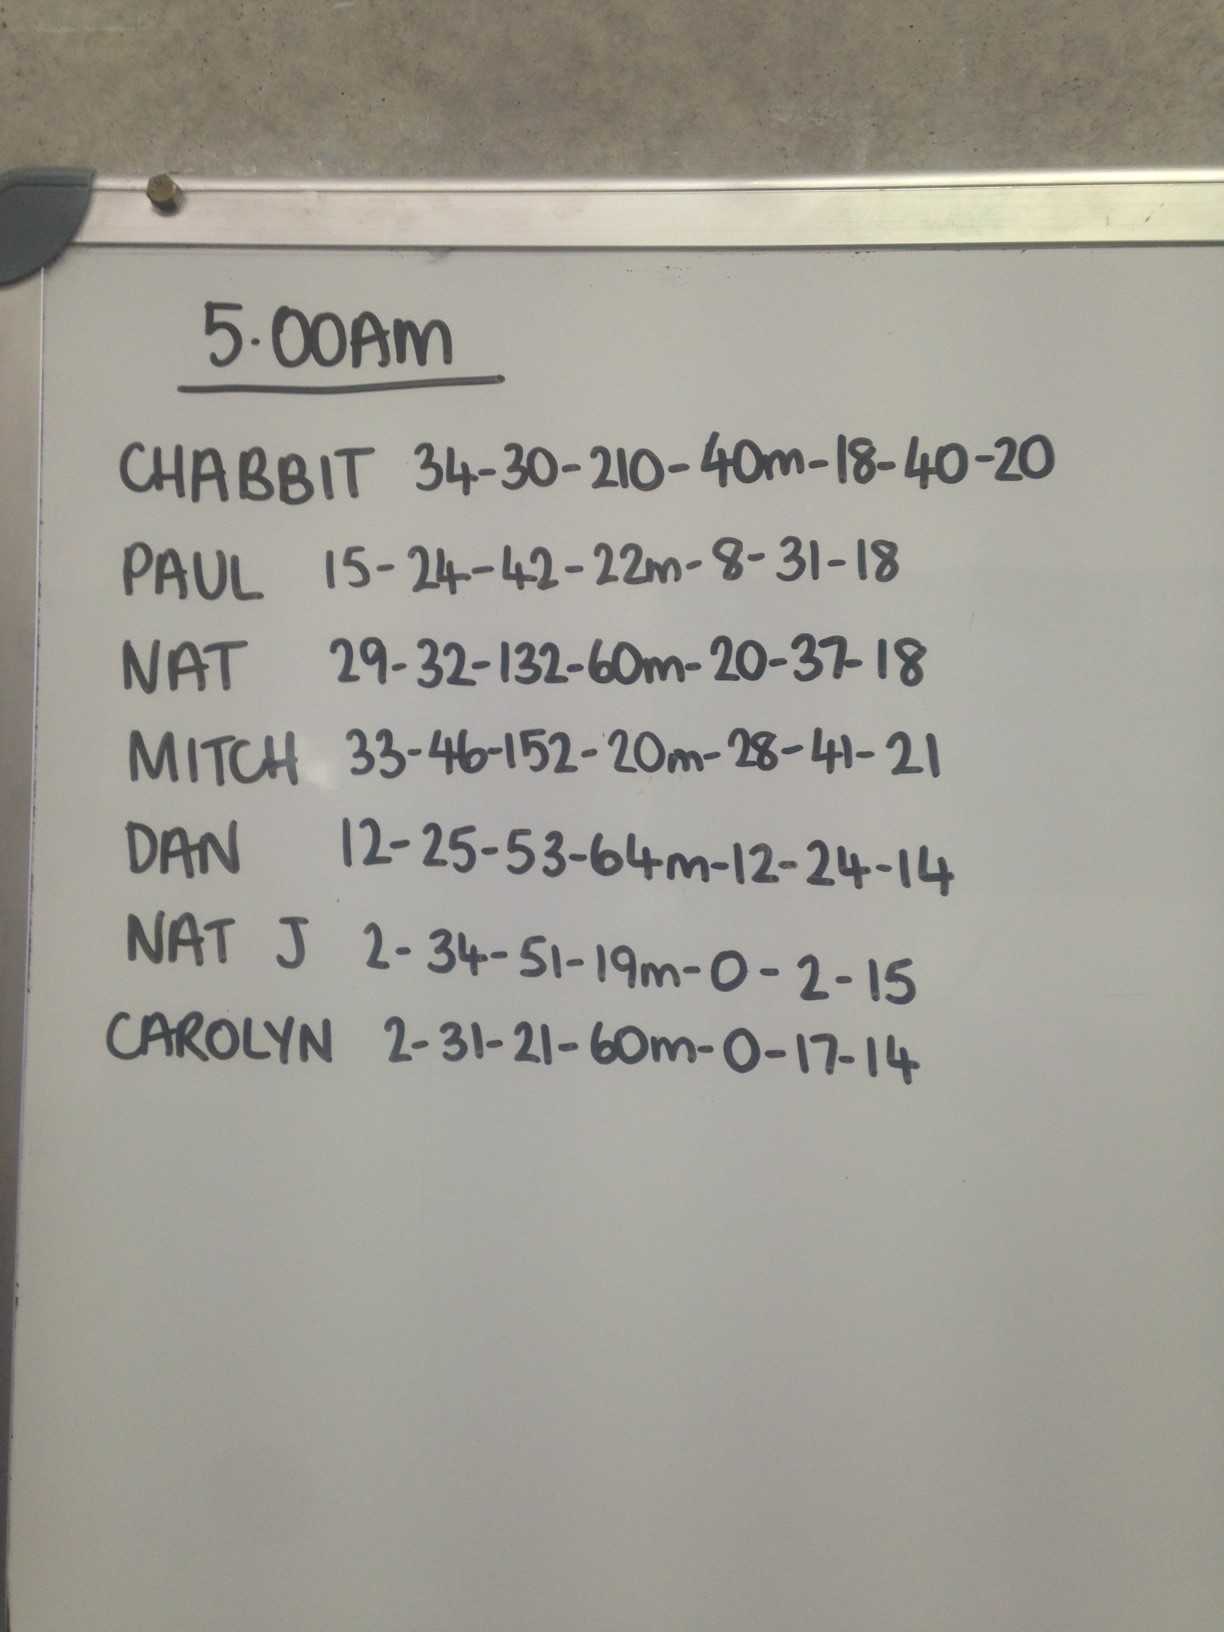
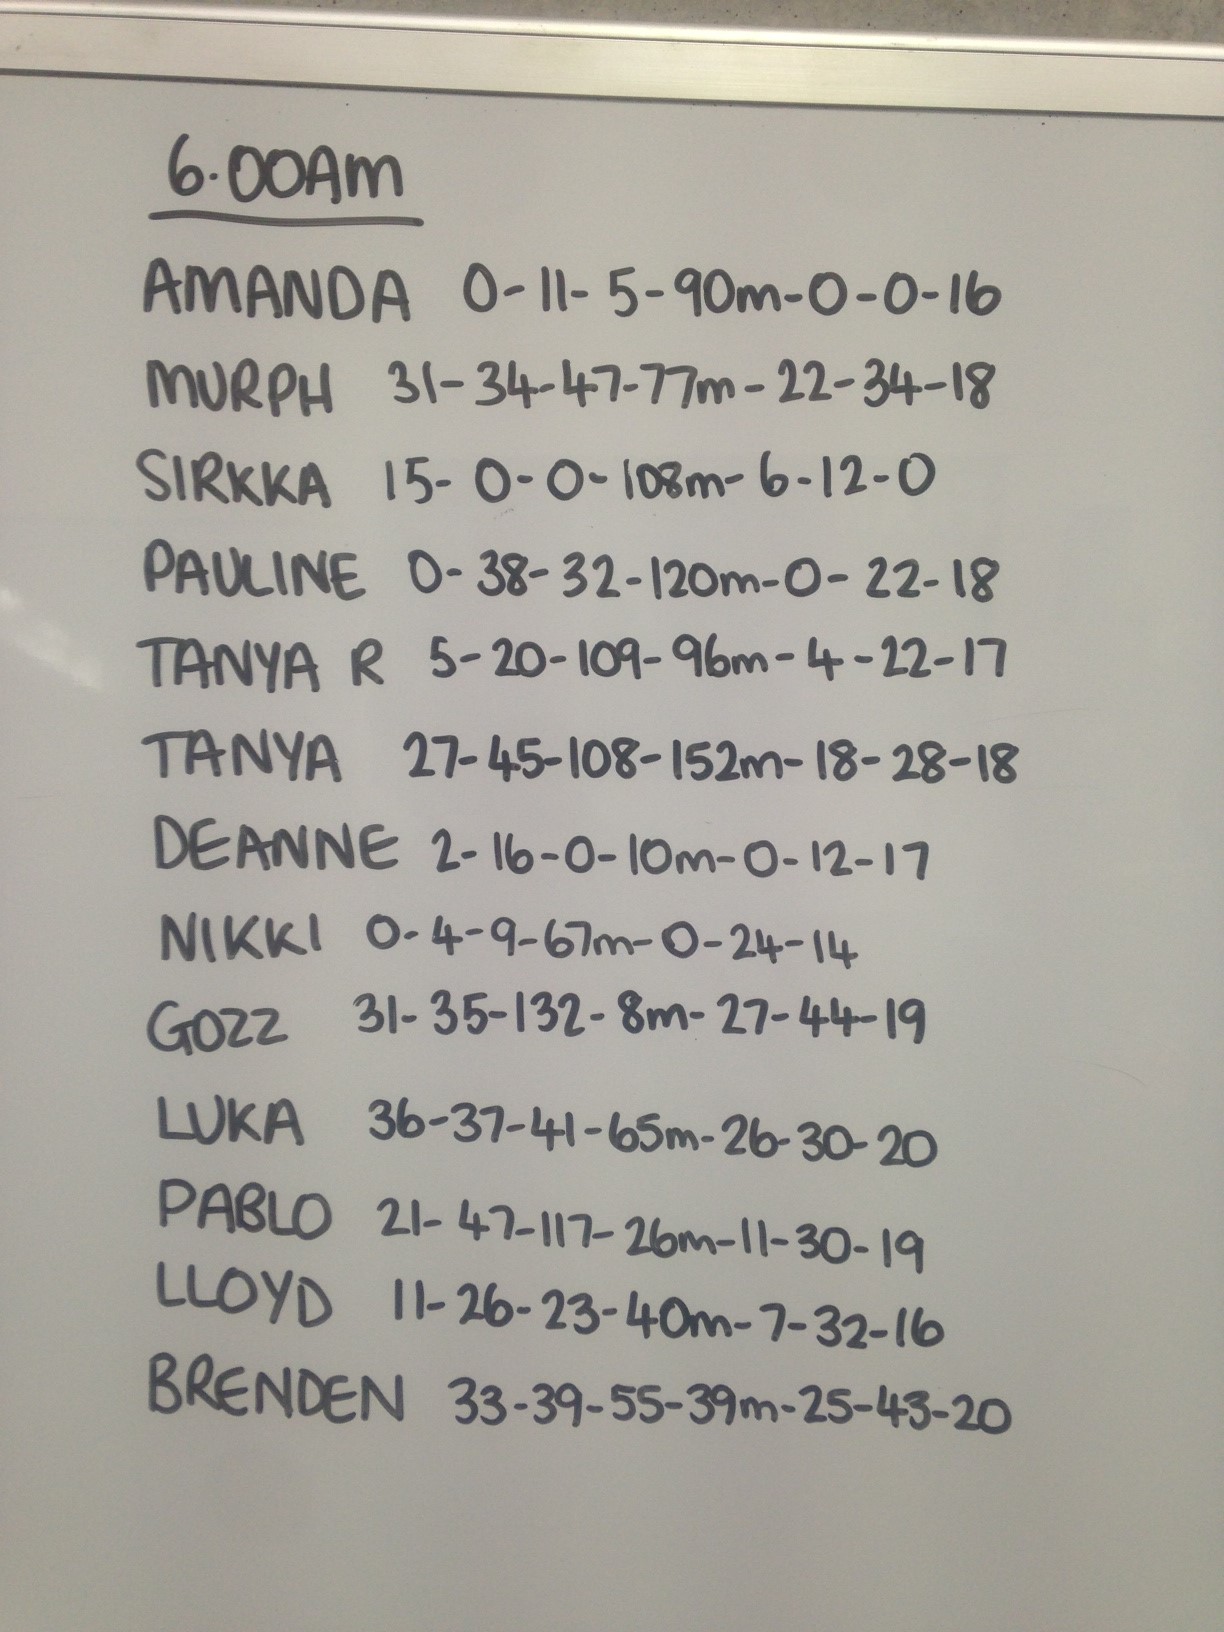
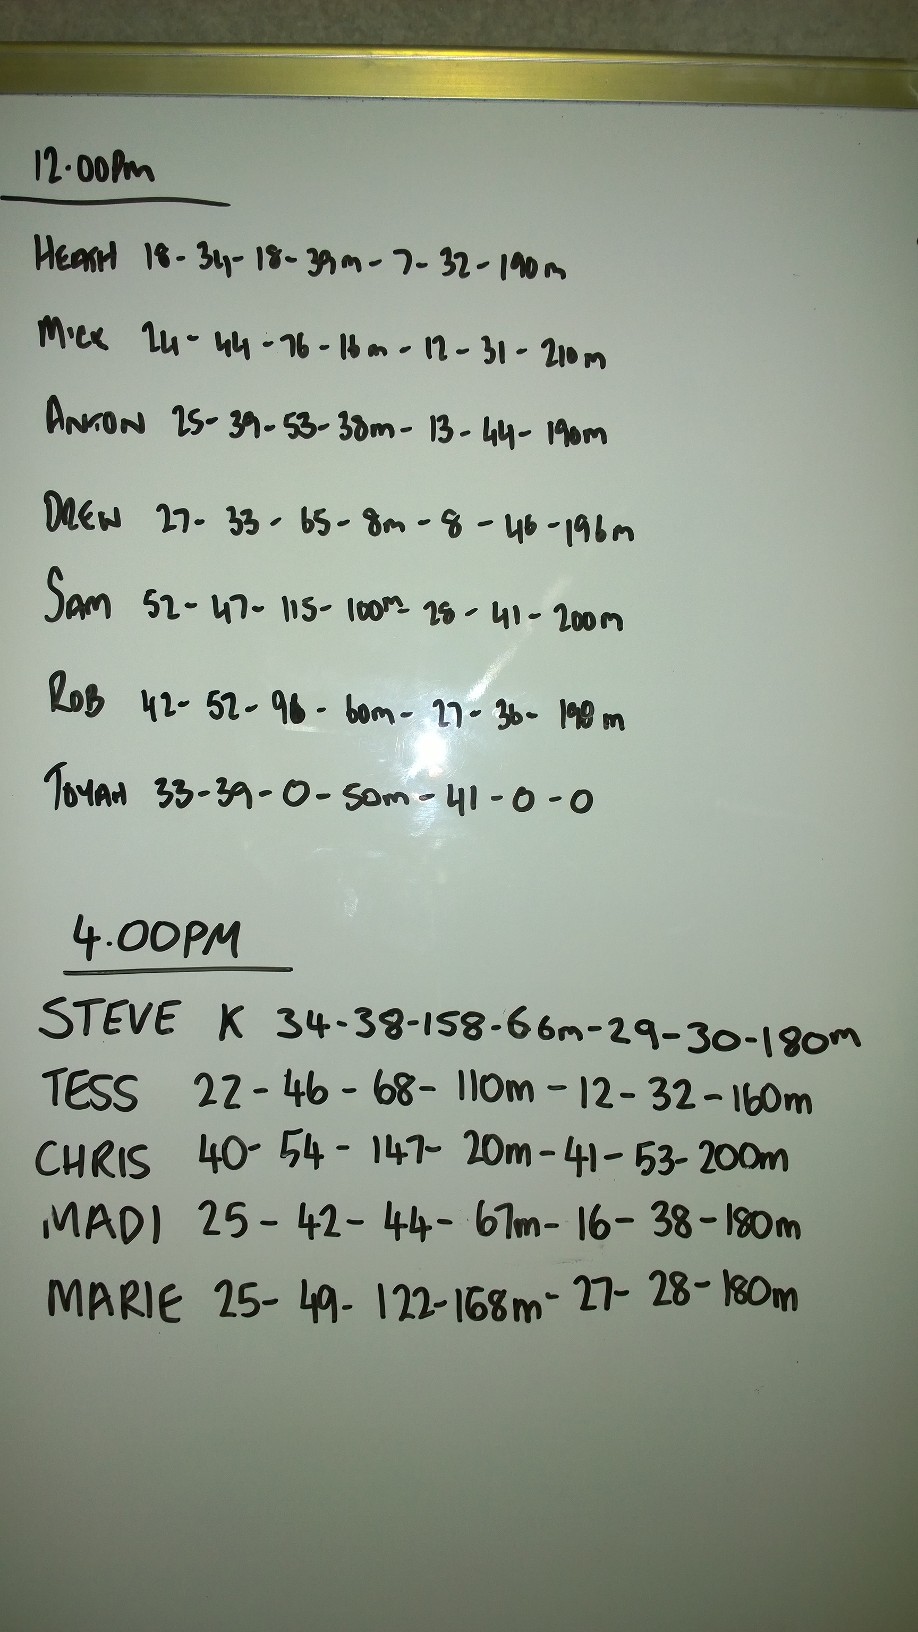
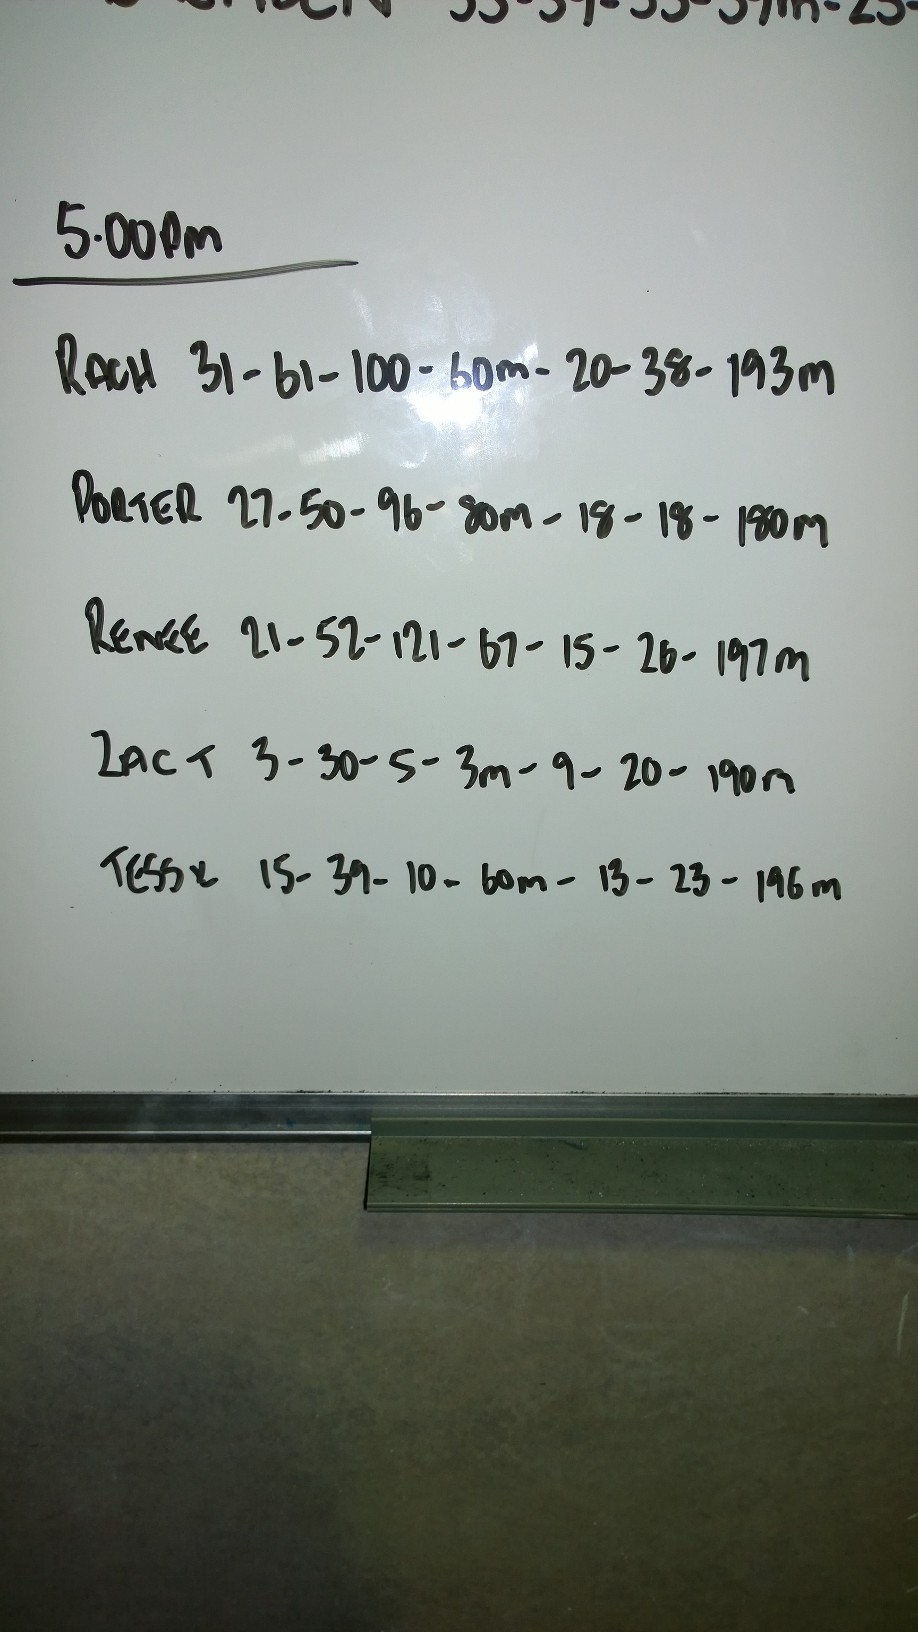
Testing Day 1
Perform the following challenges in any order with as much rest as you see fit in between.
– Toes to Bar: Max reps 90 seconds
– Box Jumps: Max reps 90 seconds (24/20″ box)
– Double-unders: Max reps 90 seconds
– Farmers Carry: Max unbroken distance carried (20/10kg weight plate pinch grip)
– Chest to Bar Pull-ups: Max reps 90 seconds
– Hand Release Push-ups: Max reps 90 seconds
– 10m Shuttle Run: Max distance in 60 seconds (3 point contact at each turn)
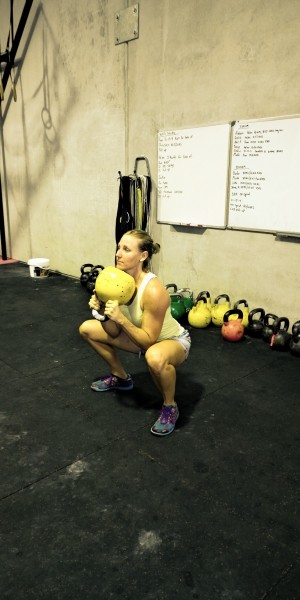
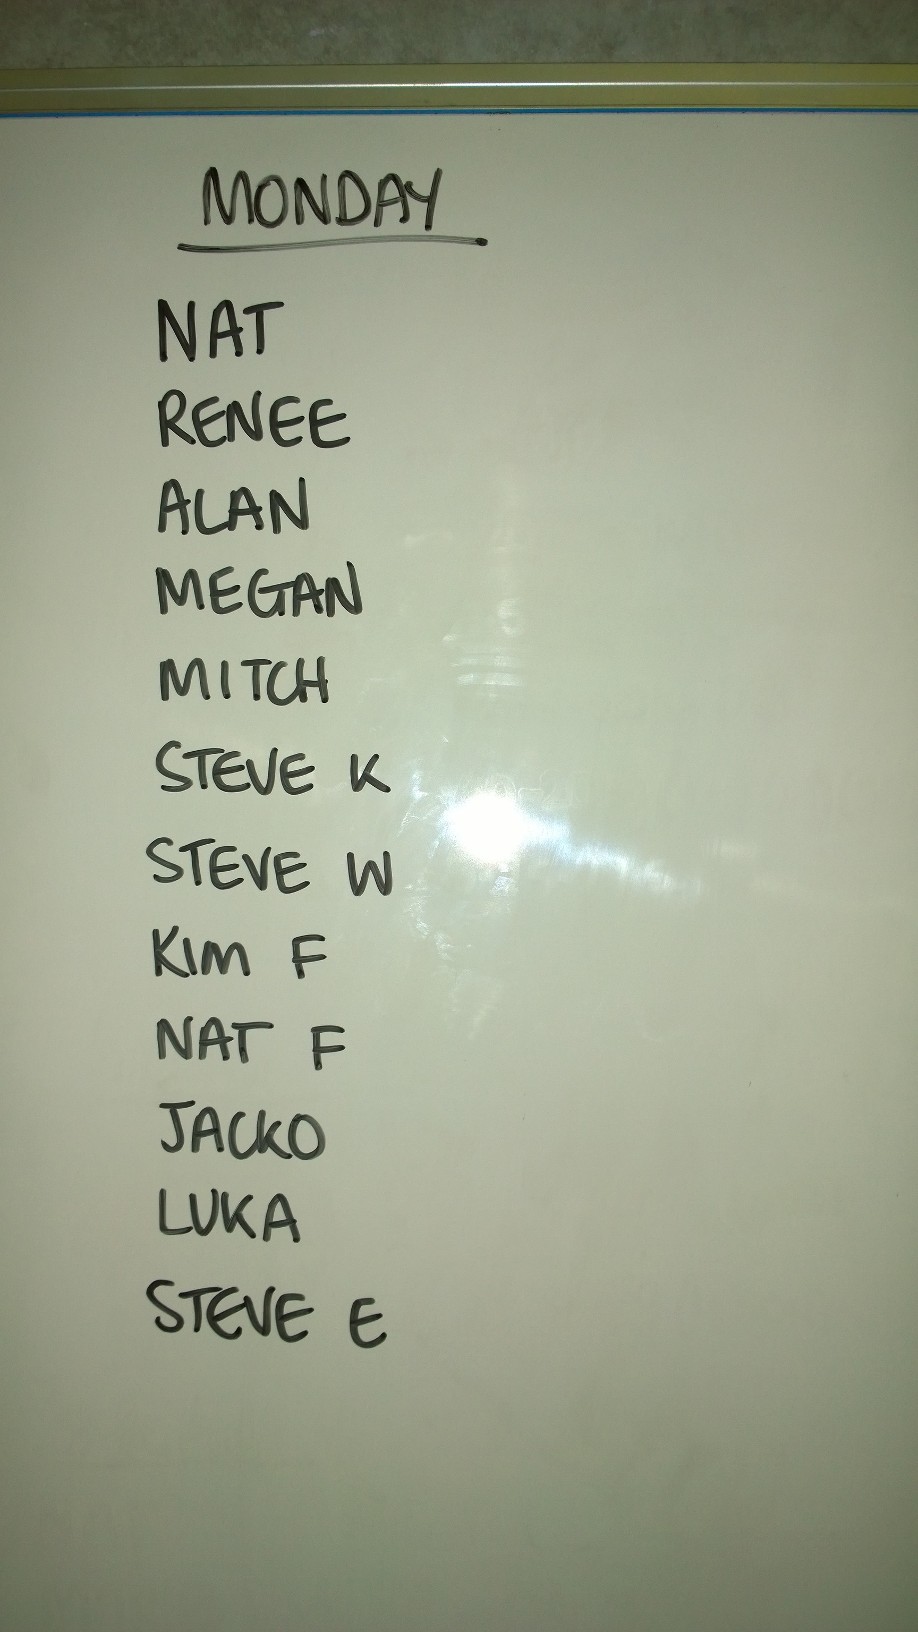
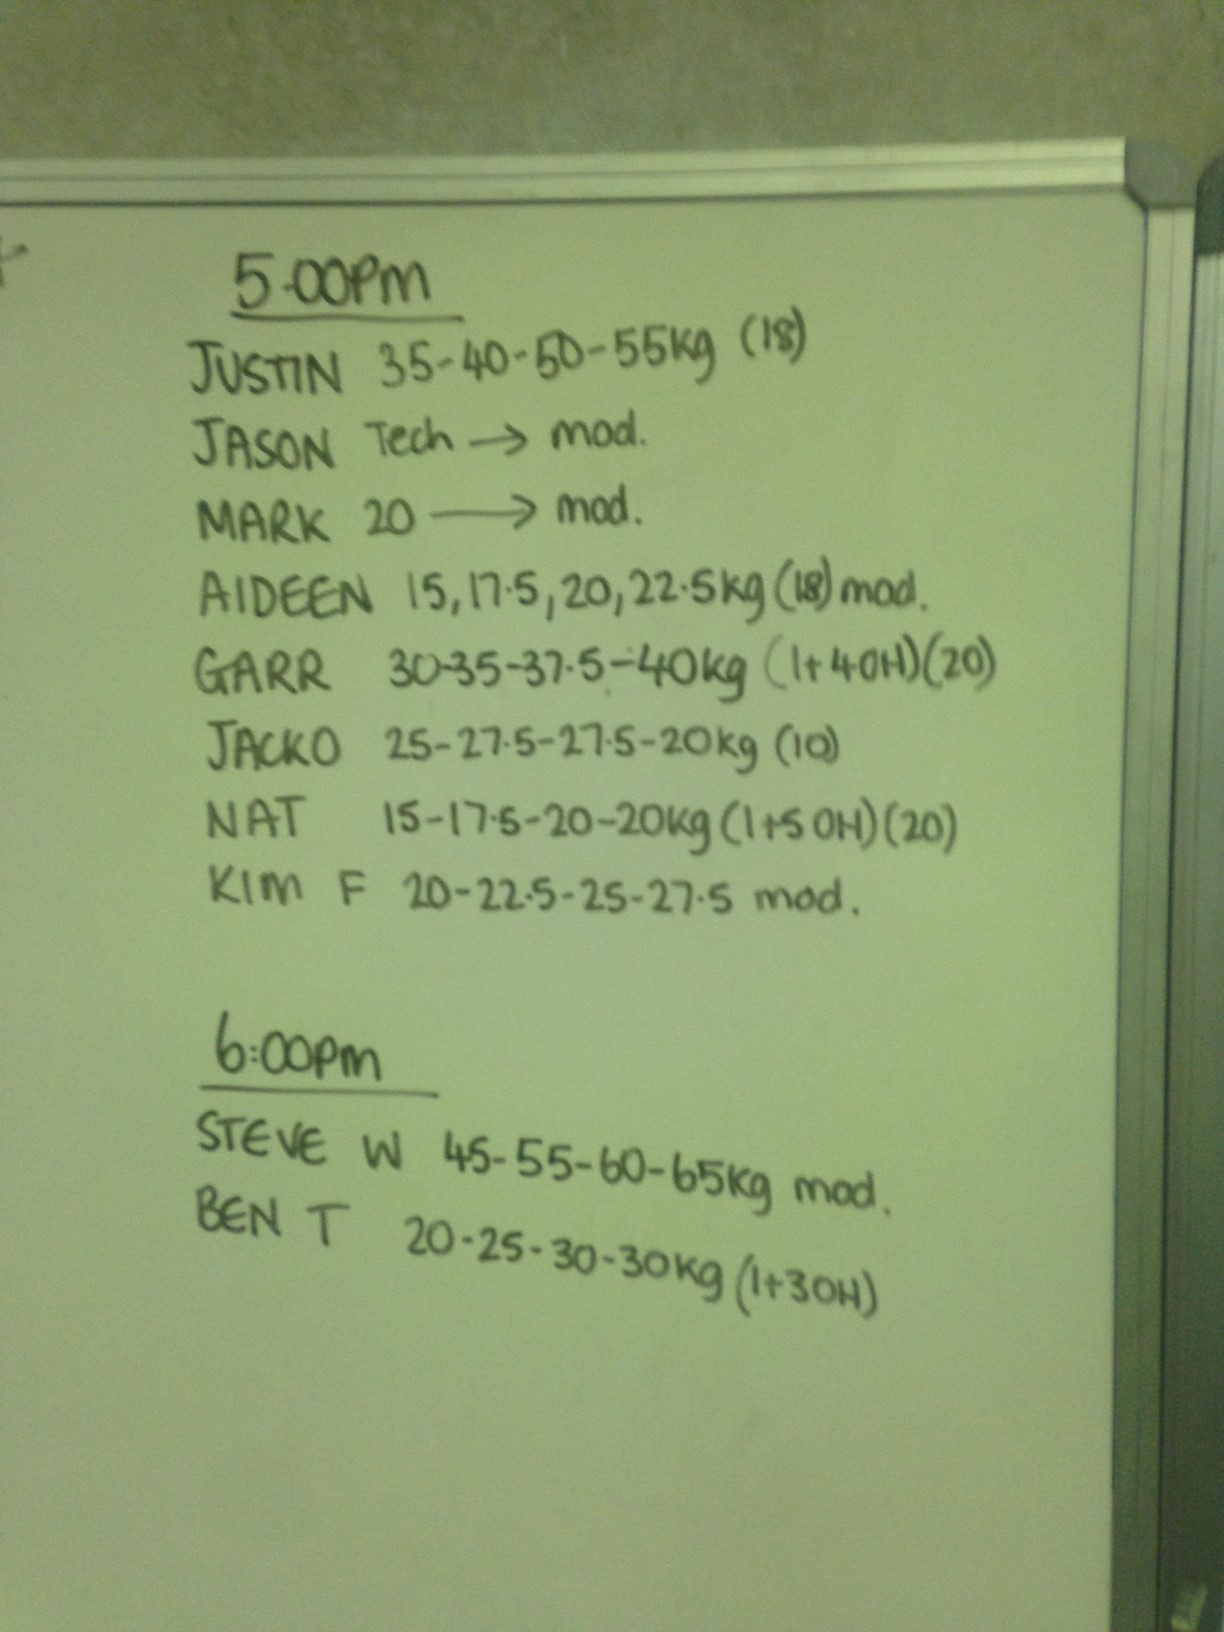
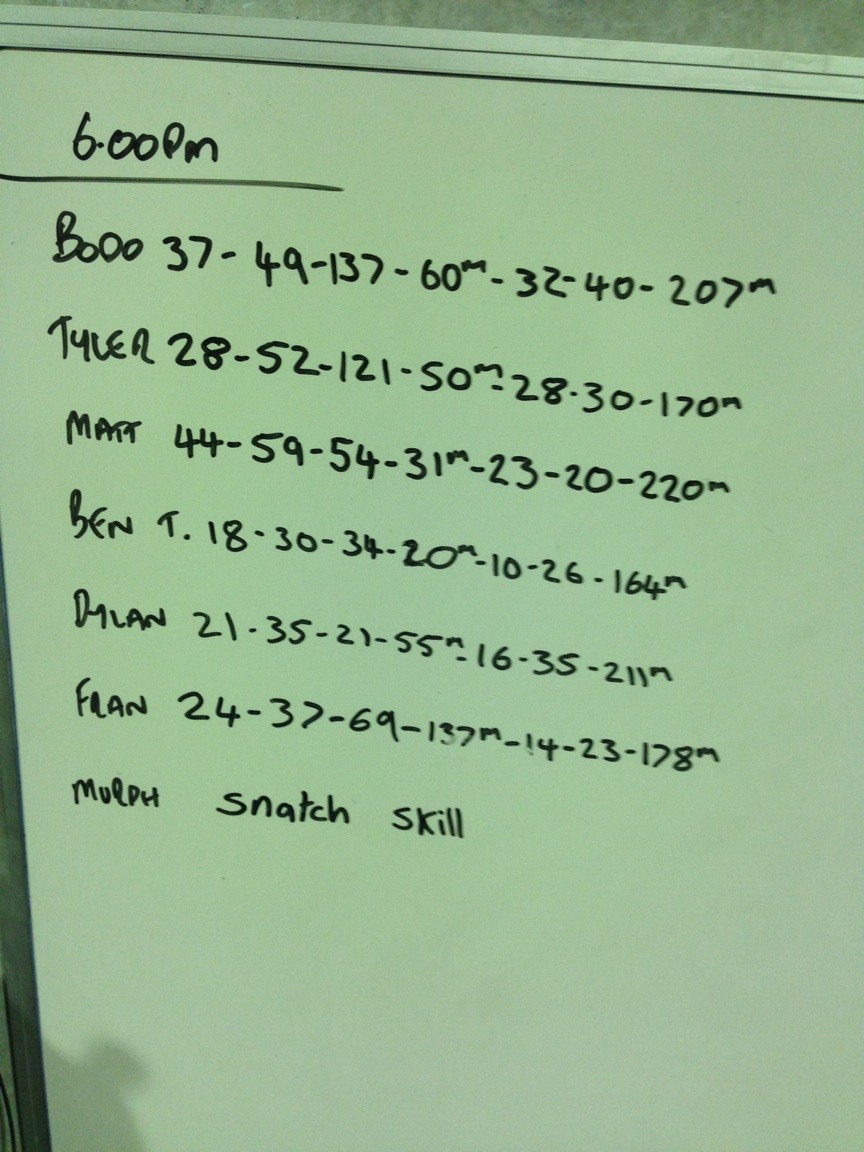
WOD: Monday
For load and time:
40 KB Squat 24/16kg (see picture)
40 Burpees (instructional video – here)
20 Front Squats (choose own load)
40 Burpees
40 KB Squat
*Front squats are taken from the ground.
*20 min cut off.
Tips: It’s likely that the load for your front squat is going to be limited by your clean – so when choosing your weight for the front squat consider how much weight you expect to be able to clean with the fatigue of the previous work under your belt.
WOD: Saturday

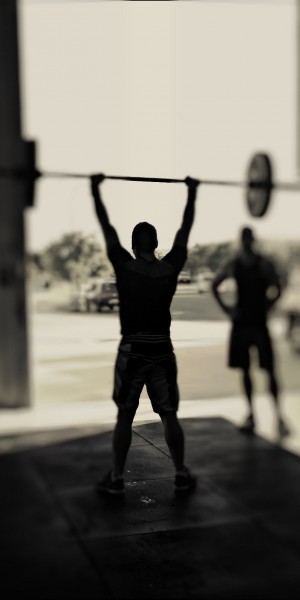
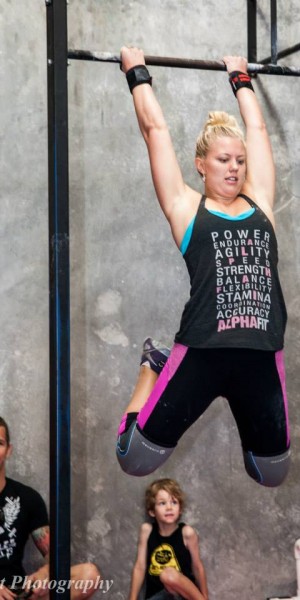
WOD: Friday
A. Work to a 3RM Hang Power Clean (must be linked) (15 min).
B. EMOM for 10 minutes:
5 Hang Power Clean (must be linked)
Burpees (see tutorial – here)
*Score = total weight/total burpees.
Tips: When picking your weight for Part B, remember that this is a conditioning workout. The aim is to be able to pick the bar up at the start of each minute and perform 5 consecutive hang power cleans (not reverse curls) and then continue to work for the rest of the minute.
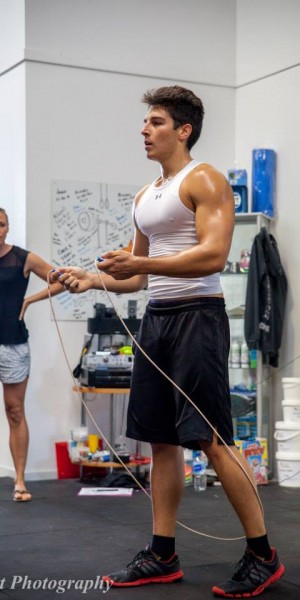
Thanks to Knight Photography for the photo.
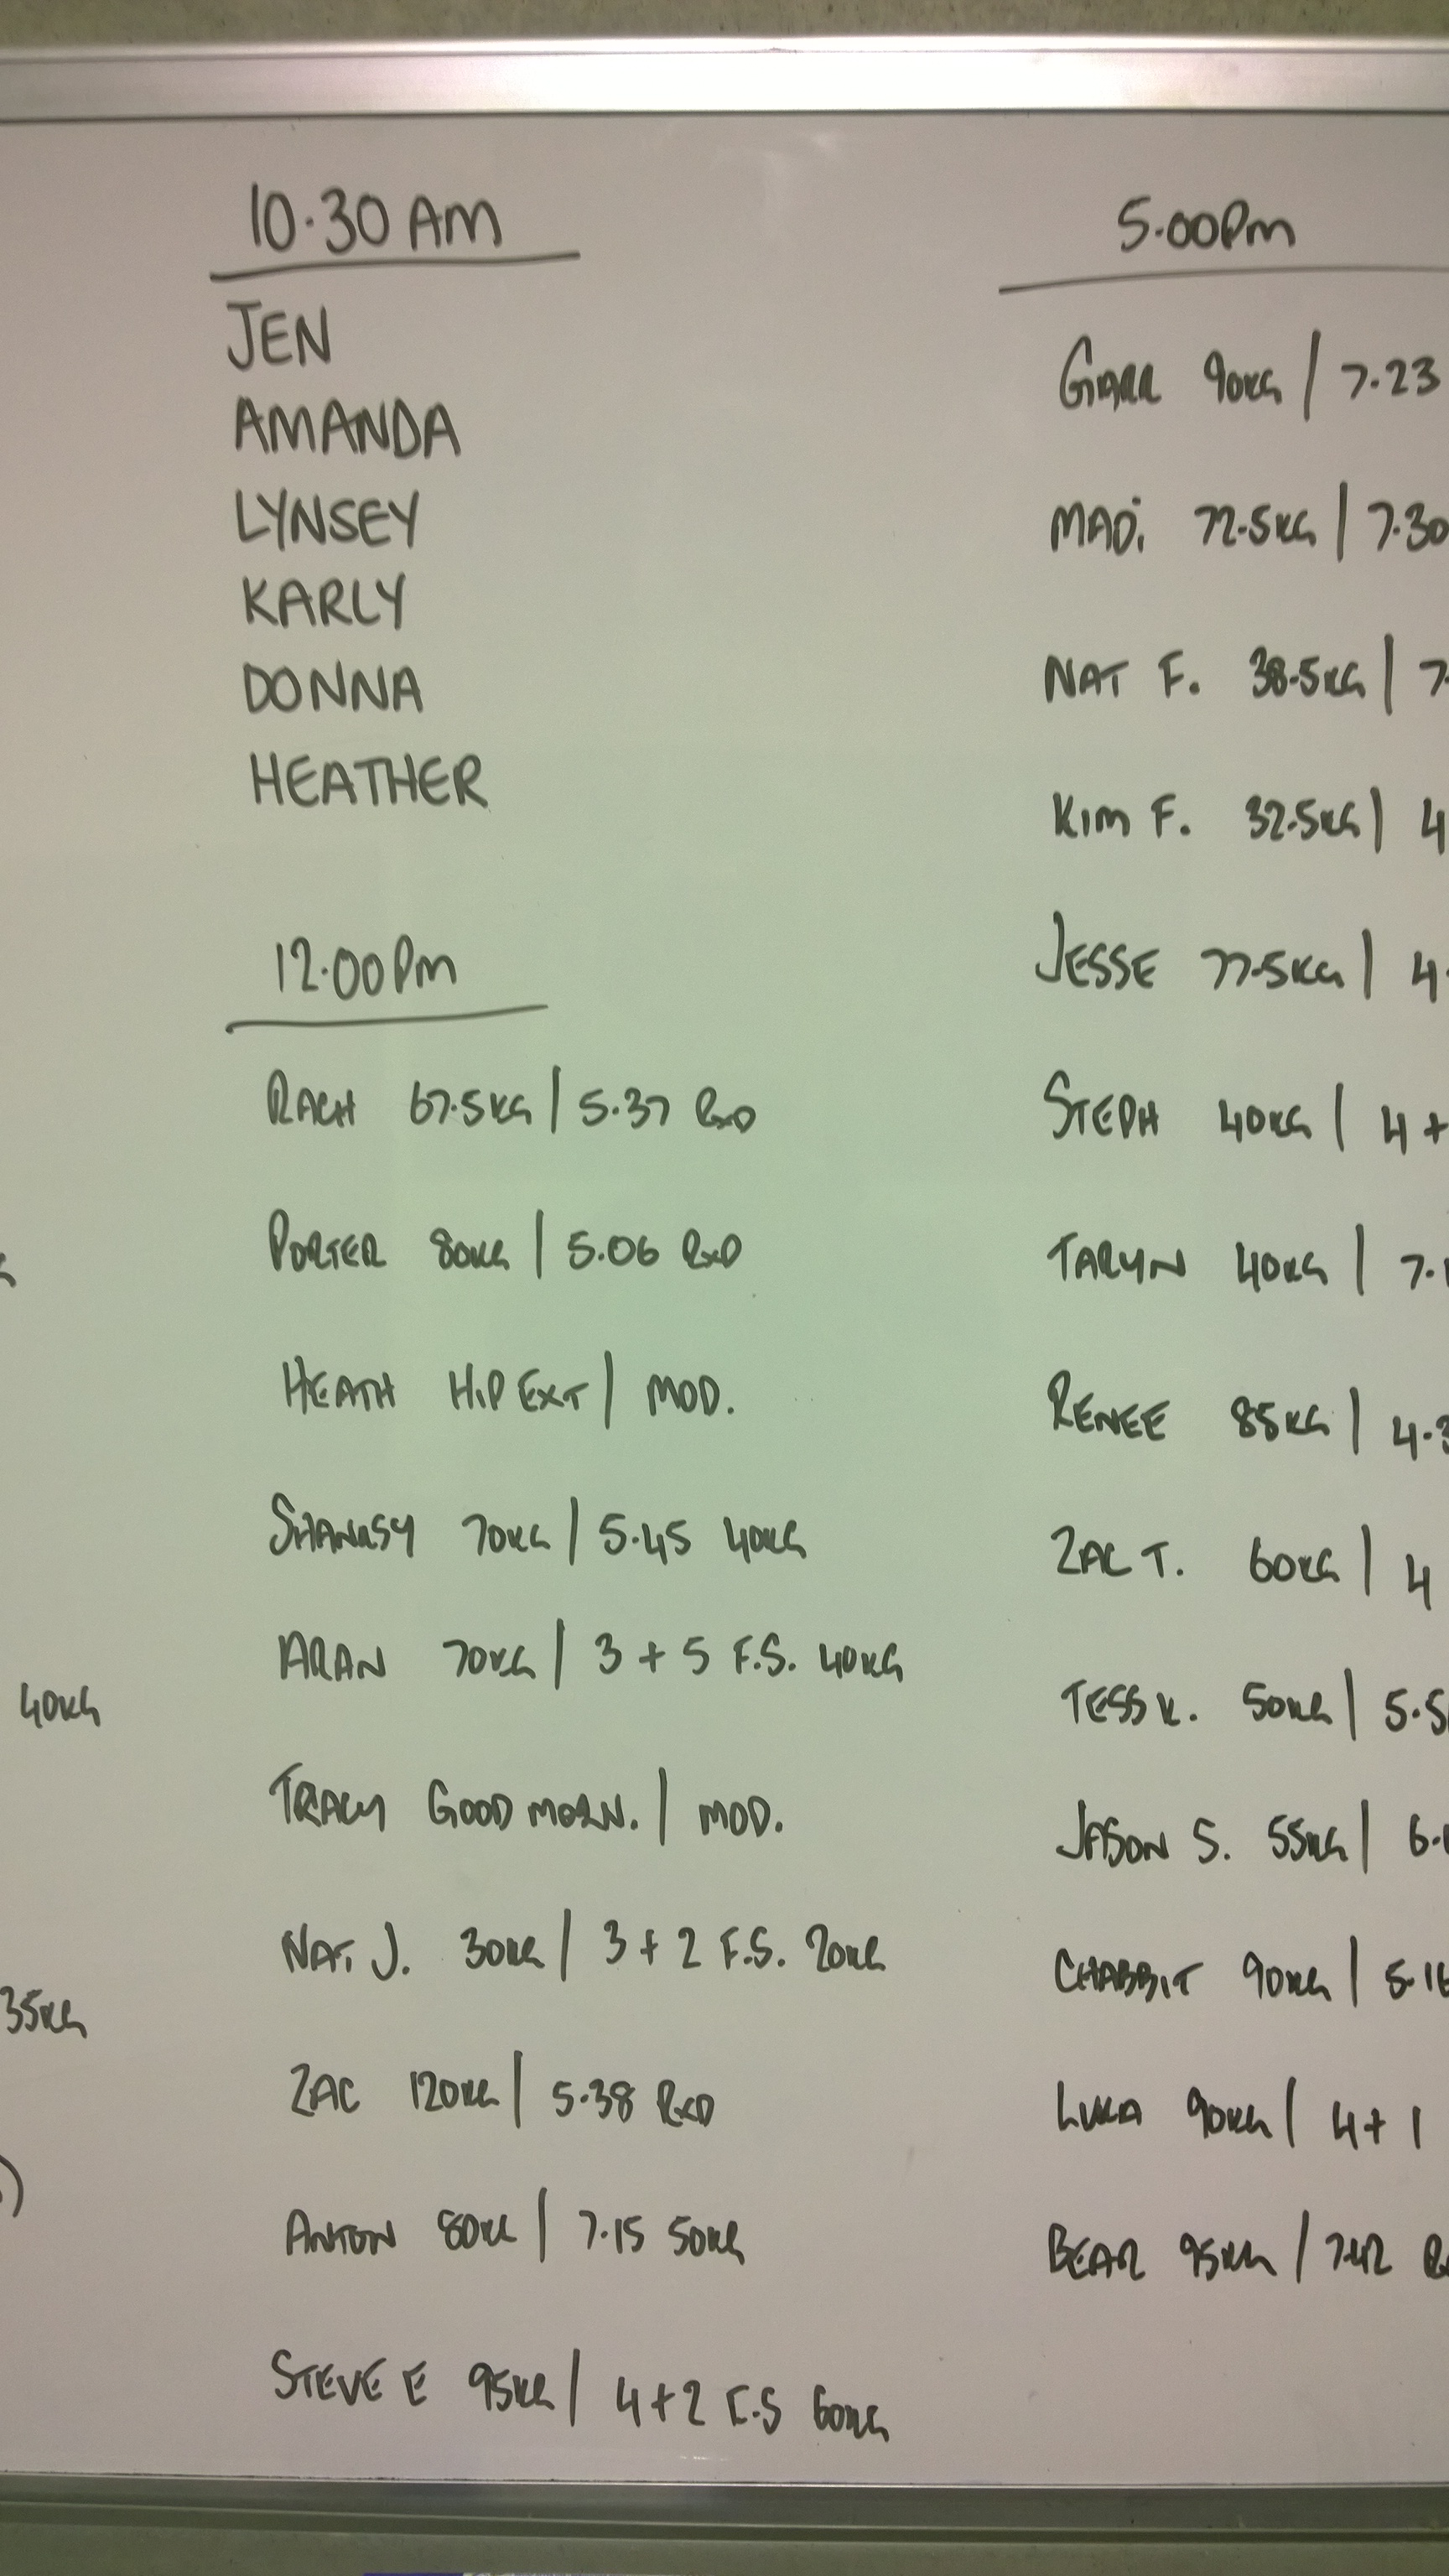
WOD: Thursday
A. 12 min to work to a 3RM Front Squat (from the ground)
B. 4 x 3 minute rounds:
Run 400m
Max UB reps (1. Pull-ups 2. Push-ups 3. Toes to Bar 4. Squats)
Rest 1 minute between rounds.
Thanks to Knight Photography for the Photo.